
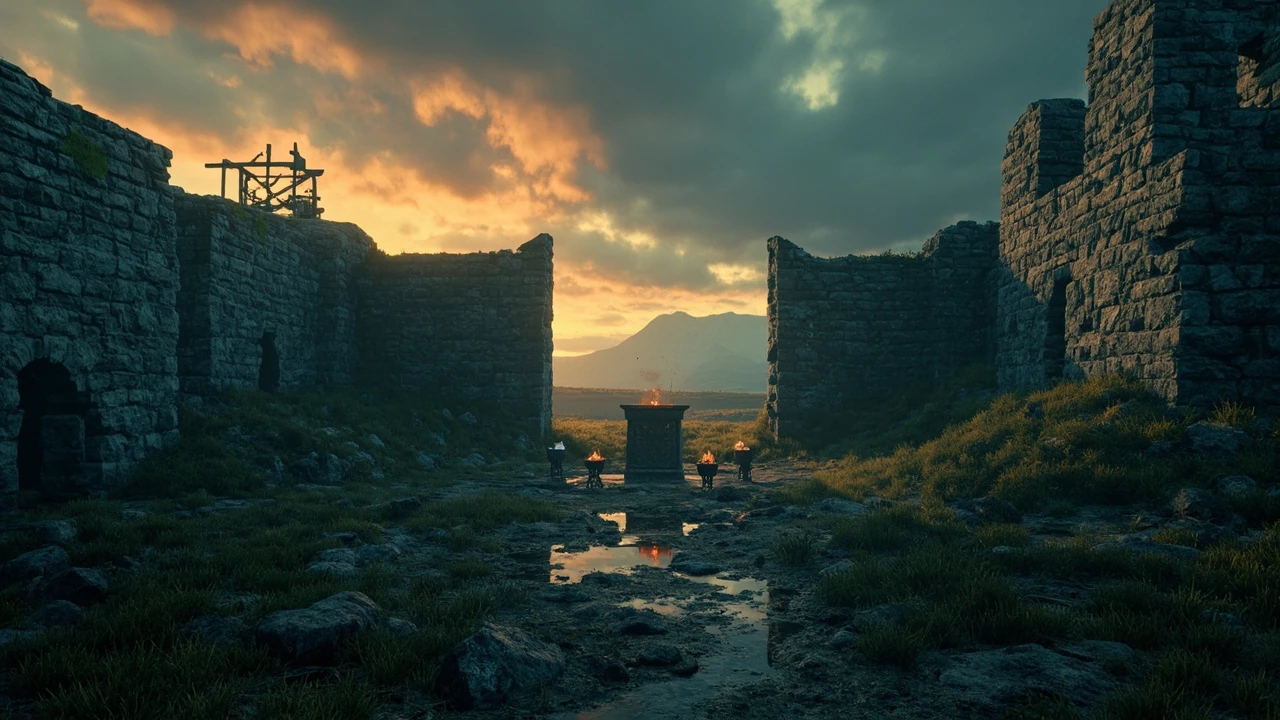
The High Keep in Hogwarts Legacy and what to expect inside the ruin
The High Keep sits on the edge of the Hogwarts Valley region in Hogwarts Legacy, and it is one of the most atmospheric open-world ruins a player can reach during the midgame. It is a small explorable interior, not a full dungeon, so most players clear it in a single focused visit. The keep blends platforming, a layered door puzzle, and a small encounter that rewards careful exploration rather than raw combat power, and the whole sequence is short enough to fit inside a five-minute loop if approached correctly.
What makes the High Keep worth a dedicated article is the combination of traversal choices and a central puzzle that is easy to misunderstand on a first visit. The ruin rewards players who observe the lighting of braziers, the height of the central shaft, and the placement of the bell above the gatehouse. It also contains a chest that is easy to miss if a player leaves through the wrong exit, which is the most common reason the keep feels unrewarding in casual playthroughs. Several community walkthroughs also list the keep as a quiet source of a Field Guide page, which is a small but real incentive for players chasing the Exploration Talent challenge.
This guide explains how the High Keep fits into Hogwarts Legacy’s broader open world, how the interior is laid out, and how the central brazier puzzle works step by step. It also covers the rewards, the recommended level, and the mistakes that cost players time or loot. The aim is to give one practical answer for a player planning a visit, with enough mechanical detail that an experienced player can plan their route in advance and avoid the kind of second trip that the puzzle design quietly invites.
Where the High Keep sits in the Hogwarts Legacy world
The High Keep is located in the Hogwarts Valley region, south of the central castle, in a section of the map that blends ruined structures with the surrounding moorland. The keep is treated by the game as a landmark ruin rather than a story dungeon, which means it is always available once the player has access to Hogwarts Valley. There is no mandatory story gate, and there is no required prerequisite quest to enter the ruin itself, although the area around the keep only opens up after the player has progressed through the early main story beats that unlock the southern Floo Flames.
From a level design standpoint, the High Keep is positioned to feel like a side reward rather than a critical path. It contains a small combat encounter, a self-contained traversal puzzle, and a clear loot payoff. The ruin is also useful as a fast travel and route planning anchor because it sits near a Floo Flame and along common paths between the valley’s Merlin Trial clusters. Players who are running a clean Hogwarts Valley sweep usually stop at the High Keep on the way between two Trials, which is the most efficient way to fold the ruin into a wider route.
Players usually reach the High Keep after they have completed the early story beats in Hogwarts Valley, when their spell set and gear are already past the introductory tier. Because the ruin does not have an official recommended level tag in the interface, the practical indicator is the level of the enemies in the immediate area. If the surrounding patrols are still trivial, the keep’s own encounter will be trivial as well, and the puzzle will be the only meaningful challenge in the run. A useful rule of thumb is to treat the keep as midgame content, which lines up with the point at which most players start running collection routes through the valley.
Recommended level, gear, and spells for the visit
There is no specific level gate for the High Keep, but the encounter and the platforming benefit from a small set of capabilities that the player may not have at the very start of Hogwarts Valley. The following checklist describes the practical minimums, not a hard requirement list, and it is based on the structure of the ruin rather than a stated difficulty value. The items are ordered by how often they are actually needed during a typical visit, which makes the list easier to scan in the field.
- A reliable ranged damage spell such as Incendio or Confringo, used both in the encounter and to ignite the puzzle braziers from a distance.
- A basic cast of Levioso, Accio, or Depulso for moving the block of carved stone that sits at the puzzle’s base.
- Wingardium Leviosa for adjusting the platform height inside the central shaft if the player chooses the indirect path.
- A broom or a strong familiarity with Hippogriff and Thestral flight, because the approach involves a small jump across a chasm that is easier with momentum.
- At least one Focus Potion charge for the central combat encounter, since two or three heavy enemies are placed in a narrow chamber.
- A basic healing spell such as Diffindo or a Wiggenweld stock, because the courtyard encounter can chew through health if the player gets cornered against the wall.
None of these tools are forced, and an experienced player can clear the keep with a leaner set. The list simply removes the most common causes of a confused first visit, which are being unable to light the braziers in the right order, being forced to backtrack out of the central shaft after a misjudged jump, and running out of Focus at the worst possible moment during the courtyard fight. Players who arrive with even three of these tools usually have a clean first visit.
How to reach the High Keep entrance
The High Keep is approached from the outside on foot, on broom, or from a flying mount, with the broom being the most common choice because the surrounding terrain is uneven. The fastest route is to fast travel to the nearest Floo Flame in Hogwarts Valley and then follow the road south until the ruin’s broken tower comes into view on the left. From that Floo Flame, the keep is a short glide away, and most players can reach the courtyard in under two minutes if the weather is clear and the broom handling is already comfortable.
Once the outer walls are visible, the entrance is on the lower courtyard side rather than the broken gatehouse side. The lower courtyard is a flat, defensible space that the game uses as a staging area for the first combat encounter. Players who fly straight to the top of the keep will usually need to back down because the gatehouse entrance is reached from below, not from the broken battlements. The keep is also easy to confuse with a smaller watchtower ruin further south, so the broken central tower is the most reliable visual landmark for the actual entrance.
The two practical mistakes players make on approach are entering through the collapsed wall section on the right and missing the courtyard entirely, or gliding over the top of the keep and looking for an interior door that does not exist. The keep has a small number of real entry points, and the lower courtyard is the intended one. A quick scan of the outer wall from the air usually shows that the courtyard is the only flat, defensible space in the immediate area, which is a useful visual confirmation that the player has the right ruin.
Inside the High Keep: layout and room order
The interior of the High Keep is short and linear, but it has a layered vertical structure that is easy to misread on a first visit. The first room is a long hall with a couple of side chambers, used for the initial combat. Past that hall is a smaller room with a movable stone block, which connects to the central puzzle chamber. Above the puzzle chamber is a second tier that overlooks the brazier array, and the final room sits behind the door that the puzzle opens. The whole interior fits inside a single screen on the in-game map, which is one of the reasons the ruin feels more like a focused puzzle room than a sprawling dungeon.
What this means in practice is that the keep reads as a sequence of three distinct spaces: a combat staging hall, a puzzle chamber with vertical sightlines, and a reward room behind the locked door. Each of those spaces has its own logic, and the game quietly teaches each mechanic before asking the player to combine them. The teaching beats are layered in a way that feels natural: the courtyard teaches the encounter tempo, the entry hall teaches the loot loop, and the puzzle chamber teaches the brazier chain. By the time the player reaches the reward room, the structure of the ruin is already clear, which is part of why a second visit feels almost mechanical.
The High Keep brazier puzzle, explained step by step
The central puzzle is built around three braziers in the lower chamber and a bell on the upper tier. The goal is to light all three braziers in a single uninterrupted sequence so that the bell rings and the heavy gate opens. If any of the braziers is allowed to go out before the third is lit, the sequence resets and the player has to start the lighting order again. The puzzle is not a race against a hard timer, but the braziers do dim quickly once the chain is broken, which gives the chain a soft pressure that punishes hesitation.
The block at the base of the puzzle chamber is the key tool. It can be moved with Accio or Depulso and is small enough to position in front of any of the three braziers. The block is then ignited with a fire spell, and the player has a short window to move the burning block to the next brazier. The third brazier is reached by carrying the burning block up a short flight of steps. The block is the only object in the chamber that can hold a flame long enough to act as a transfer tool, which is a small design choice that quietly forces the player into the intended solution.
The two common errors are burning the block too late, which leaves no time to reach the upper brazier, and trying to light the braziers from the upper tier with a ranged spell. The braziers do respond to ranged fire, but the timer does not respect a ranged approach because the braziers extinguish at the same rate, and the player has to be in the central chamber to keep the sequence alive. Players who ignore the block and rely on direct ignition usually get two braziers lit before the third one dims, which forces a reset and a second attempt. The cleanest solution is to commit to the block from the start, light it once, and keep the chain moving until the third brazier is alight.
Room-by-room walkthrough of the High Keep
Step one is the lower courtyard encounter. Two to three enemies spawn on entry, and the encounter is designed to be cleared quickly. The combat space is wide and provides good sightlines, and the player can use the side arches for cover without losing line of sight on the brazier room entrance. The encounter is also a useful place to spend any leftover cooldowns from the previous combat, because the courtyard is the only part of the keep where a drawn-out fight is even possible.
Step two is the entry hall. This is a short corridor with a movable stone block, two side chambers with minor loot, and a door into the puzzle chamber. The side chambers are optional, but the loot in them is what most casual visitors miss. The chambers are easy to overlook because their doors are partly hidden behind fallen masonry. A useful habit is to enter the entry hall slowly and sweep both side chambers before stepping into the puzzle chamber, because once the puzzle is solved, the side chambers are easy to forget on the way out.
Step three is the puzzle chamber, which is the heart of the High Keep. The brazier array is visible from both the lower and upper tiers, and the movable block is positioned in the lower section at the start of the encounter. The puzzle is solved by igniting the block, moving it to the first brazier, then the second, then carrying the burning block up to the third. The upper tier is also a useful vantage point for a first read of the chamber, because it shows the full brazier layout and the position of the bell at a glance.
Step four is the bell and gate sequence. When the third brazier is lit, the bell on the upper tier rings once and the heavy door in the lower chamber opens. That door leads into the reward room, which contains a chest and a small piece of lore. The final room is also the only place where a quiet, atmospheric cutscene-style camera move plays, which is a good visual cue that the puzzle has been completed. The camera move is short, but it is one of the few moments in the keep where the game acknowledges the player’s effort outside of the standard UI prompts.
Combat in the High Keep: who attacks and when
The keep is defended by a small, focused encounter rather than a sprawling fight, which fits the ruin’s design as a side landmark. The two to three enemies that spawn in the lower courtyard are the same set that the player has already been fighting in the valley, so the encounter is more about positioning than about a new enemy type. The encounter is also one of the few moments in the valley where the game places the enemies in a tight group, which makes area-of-effect spells and Diffindo surprisingly effective for a first clear.
The puzzle chamber itself is empty during the brazier sequence, which is a deliberate choice. It keeps the puzzle legible and prevents the player from being forced to break the brazier chain to deal with an enemy. The reward room is also empty, which is a small but welcome signal that the encounter is over. The empty puzzle chamber is also the reason the keep feels calm once the courtyard fight is over, and it is part of why a focused visit can be wrapped up in a few minutes.
Players who want a smoother experience tend to clear the courtyard, recover their health, and start the puzzle with a full Focus bar. That single habit removes the most common reason the puzzle feels chaotic, which is a half-burned brazier chain interrupted by a late spawn. It is also worth using a single Wiggenweld before stepping into the puzzle chamber, because the puzzle takes long enough that a low-health player can be caught off guard by a stray enemy from the courtyard if one of the earlier enemies is still tagged as alive.
What you find in the reward room
The reward room contains a single named chest and a small piece of readable lore. The chest holds a piece of gear that is appropriate for the player’s level at the time of the visit, and the lore text adds a short paragraph of context about who held the keep and why it fell. There is no unique named weapon or named robe set in this chest, which is why the keep is treated as a useful landmark rather than a must-clear dungeon. The gear inside is still worth picking up, because the level scaling means it usually replaces an older piece in one of the active slots.
The most frequently missed reward is not the chest itself but the side chamber loot. One of the two side chambers contains a Field Guide page, which is the collectible that unlocks the relevant Talent challenge in the collection menu. Missing that page is the main reason a player has to return to the keep a second time, which is the only meaningful reason to treat the High Keep as a multi-visit location. The second side chamber usually contains a small bundle of galleons or a common potion, which is less exciting but still worth a quick sweep on a first visit.
How the High Keep compares to other Hogwarts Legacy ruins
Hogwarts Legacy uses a small set of ruin templates across the map, and the High Keep sits in the middle of that set. The following table compares the High Keep with two other common ruins in Hogwarts Valley in terms of encounter length, puzzle type, and reward. The aim is not to rank them but to help a player decide whether to route them together or treat them as separate visits. The table is based on a standard midgame visit, and the rewards scale with the player’s level at the time of the visit.
| Ruin | Region | Combat length | Puzzle type | Main reward |
|---|---|---|---|---|
| The High Keep | Hogwarts Valley | Short, courtyard only | Brazier chain with movable block | Gear chest plus Field Guide page |
| Witch’s Tomb | Hogwarts Valley | Short, single room | Fire chain through multiple chambers | Gear chest and a unique cosmetic |
| Forbidden Forest ruin | Forbidden Forest | Medium, two waves | Statue rotation gate | Gear chest plus spellcraft notes |
Two practical conclusions follow from the table. First, the High Keep rewards careful exploration more than combat, which is unusual for a ruin in this region. Second, the High Keep is a good pairing with another short ruin in the same area when the player is on a clean Hogwarts Valley sweep, because the travel time between landmarks is short and the combined loot is more efficient than two separate visits. The table also makes it clear that the High Keep is a puzzle-first landmark, which is a useful framing for players who usually skip ruins because they expect a long combat grind.
Common mistakes at the High Keep
Players who find the High Keep unsatisfying usually make one of three mistakes. The first is approaching from the wrong side, which leads to a long detour around the broken wall before reaching the courtyard. The second is trying to solve the brazier puzzle by igniting the braziers directly with a ranged spell and ignoring the movable block, which resets the sequence repeatedly. The third is leaving through the upper tier after the bell rings instead of dropping back down to the reward room, which causes the player to miss the chest and the Field Guide page.
The table below lists the most common mistakes, the symptom, and the practical correction. The corrections are mechanical fixes rather than vague tips, which keeps the table useful for a player who is already at the ruin and trying to recover. The symptoms are written to match what a player actually sees in the moment, so the table is a useful reference even if the player has only just realized something has gone wrong.
| Mistake | Symptom | Fix |
|---|---|---|
| Wrong approach side | Long detour around the outer wall | Land in the lower courtyard, not on the broken battlements |
| Igniting braziers from range | Puzzle resets after the second brazier | Use the movable block and carry the burning block between braziers |
| Leaving through the upper tier | Missing the chest and Field Guide page | Drop back down to the lower chamber after the bell rings |
| Skipping the side chambers | No Talent challenge unlock | Loot both side chambers before solving the puzzle |
| Carrying the block too slowly | Third brazier dims before it can be lit | Move the burning block steadily and avoid stopping to reposition |
The mistake list is also a reasonable order of operations for a first visit. Approaching from the courtyard, looting the side chambers, and saving the puzzle for last turns the High Keep into a clean five-minute loop instead of a confused backtrack. Players who internalize that order of operations usually have a much smoother first visit, and they tend to remember the ruin as a small, well-paced landmark rather than a frustrating puzzle room.
Field Guide pages, challenges, and the collection hook
Hogwarts Legacy uses a collection system that ties specific items, including Field Guide pages, to Talent challenges in the Field Guide menu. The High Keep is one of the smaller sources of these pages, and the page inside the ruin is the relevant entry for the Exploration Talent challenge that covers Hogwarts Valley landmarks. The page is a quiet but real reward, because the Exploration challenge is one of the larger Talent tracks in the game and a single missing page can block a meaningful chunk of progress.
The practical implication is that a player who skips the High Keep’s side chamber has to return later to pick up the page, which is a small but real loss of momentum. The page is also a useful signal that the keep has been fully cleared, because the page is the last item that can be missed on a typical visit. Once the page is in the collection menu, the keep has nothing else to offer on a standard playthrough, which is why most players treat the second visit as a one-minute sweep rather than a full run.
For players who are running a clean collection run, the High Keep is best treated as a stop on a wider route that includes the nearby Merlin Trials and a small set of bandit’s camps. That routing decision is the difference between a focused sweep and a scattered set of return trips. A clean collection run also benefits from a habit of marking each Field Guide page on the in-game map as soon as it is collected, because the High Keep’s page is easy to forget in the middle of a longer valley loop.
How the High Keep fits the game’s design language
The High Keep is a good example of Hogwarts Legacy’s approach to landmark design. The ruin is short, legible, and self-contained, with a clear visual hook in the brazier array and a small, mechanical puzzle that the player can solve with the standard spell set. There is no hidden second dungeon and no multi-stage narrative inside the ruin, which is a deliberate choice that keeps the open world from feeling padded. The keep is also a useful example of how the game uses short landmarks to break up the pacing of longer dungeons, which is a quiet but important part of the open-world rhythm.
The keep also serves as a quiet narrative beat. The readable lore inside the reward room adds a paragraph of context that ties the ruin to the broader history of Hogwarts Valley, and the absence of a named enemy gives the keep a more atmospheric feel than a combat-heavy dungeon. Players who want a break from the larger story missions often stop at the High Keep for that reason. The lore text is short, but it is one of the few moments in the valley where the game pauses to give a small piece of local history instead of dropping another side quest marker.
Routing the High Keep into a wider Hogwarts Valley loop
For players who want to use the High Keep as part of a wider route, the keep sits well between the valley’s southern Floo Flame and the cluster of Merlin Trials on the western moor. The following list describes a practical loop that includes the High Keep, two nearby Trials, and a small camp. The loop is not mandatory, and a player can rearrange the order without losing much time, but it is a useful baseline. The loop is designed to be walked at a comfortable pace, with short breaks for the brazier puzzle and the Merlin Trial platforming.
- Fast travel to the southern Hogwarts Valley Floo Flame and head west toward the keep.
- Clear the lower courtyard encounter and loot both side chambers before touching the puzzle block.
- Solve the brazier chain by carrying the burning block from the first brazier to the upper brazier.
- Drop down to the reward room, open the chest, and pick up the Field Guide page.
- Continue west to the nearest Merlin Trial and solve the brief platforming or combat challenge.
- Finish the loop at the bandit camp on the southern road and fast travel back.
The loop works because the High Keep, the Merlin Trials, and the bandit camp are clustered closely enough to walk between them without fast travel, which is the most efficient way to clear the southern half of Hogwarts Valley. A player who treats the keep as a standalone stop is paying extra fast travel loading screens for very little gain. The loop is also a good way to test a new broom or a new spell set, because each stop uses a different part of the standard kit and the route fits comfortably inside a single play session.
What a developer-focused reader can take from the High Keep
For readers with a game development interest, the High Keep is a useful small case study in how Hogwarts Legacy structures a midgame landmark. The ruin layers three teaching beats in order: a short combat encounter, a mechanical puzzle, and a clean reward. Each beat is isolated from the next, which is a deliberate readability choice and a common pattern in open-world design when the developer wants a landmark to be approachable without a tutorial overlay. The keep is also a useful example of how a short landmark can carry the same narrative weight as a longer dungeon, because the readable lore and the camera move in the reward room do most of the work that a longer cutscene would do in a bigger site.
The brazier puzzle in particular illustrates a small but useful design idea. The puzzle has a simple visual goal, a single physical tool, and a soft timer that punishes inattention without punishing failure harshly. That structure is a good example of a tutorial-by-environment pattern, where the world itself explains the mechanic through a clear visual loop instead of a text prompt. It is also a useful reference for designers who are trying to design puzzle landmarks that feel like part of the world rather than a minigame bolted onto the map.
For developers comparing open-world templates, the High Keep is a useful contrast to the larger dungeons in Hogwarts Legacy. The larger dungeons layer multiple puzzle types and a longer story beat, while the High Keep compresses that structure into a single, focused visit. The contrast is a reminder that open-world pacing depends on a mix of long and short landmarks, and the short landmarks carry a meaningful share of the player’s routine. The keep is also a useful example of how a small ruin can support collection systems, because the Field Guide page gives the landmark a reason to exist beyond its immediate combat and puzzle content.
Frequently asked questions
Where is the High Keep in Hogwarts Legacy?
The High Keep is in the Hogwarts Valley region, on the southern side of the valley, in a ruined fortress that sits on a small rise above the moor. It is reachable on foot, on broom, or from a flying mount, and it is one of the easier landmarks to spot because the broken tower is visible from the nearby Floo Flame.
Do I need a specific quest to enter the High Keep?
No. The High Keep does not have a mandatory story gate, and there is no prerequisite quest required to enter the ruin. The keep is treated as a side landmark, which means it is available as soon as the player has access to Hogwarts Valley and can reach the courtyard entrance.
Is there a recommended level for the High Keep?
The game does not display a recommended level for the ruin, but the practical indicator is the level of the enemies in the surrounding valley. If the patrols in the area are no longer a threat, the High Keep’s encounter will be no threat either, and the puzzle will be the only meaningful challenge.
How do I solve the brazier puzzle in the High Keep?
Light the movable block with a fire spell, carry the burning block to the first brazier, then the second, and finally up the short flight of steps to the third. The bell rings when the third brazier is lit, and the heavy door in the lower chamber opens. If any brazier goes out before the third is lit, the sequence resets.
What is the reward for completing the High Keep?
The reward room behind the heavy door contains a single gear chest with a piece of equipment appropriate to the player’s level, plus a small piece of readable lore. The ruin also contains a Field Guide page in one of the side chambers, which is the relevant entry for the Exploration Talent challenge in the Field Guide menu.
Why does the High Keep puzzle keep resetting?
The puzzle resets when a brazier is allowed to go out before the third one is lit. The most common cause is trying to ignite the braziers from range with a spell, because the timer does not respect a ranged approach. The correct method is to use the movable block and carry the burning block between the braziers in a single chain.
Can I miss the High Keep chest if I leave through the wrong exit?
Yes. The chest is in the reward room behind the heavy door in the lower chamber. If the player leaves through the upper tier after the bell rings, the reward room is skipped and the chest, the Field Guide page, and the readable lore are missed. The correct path is to drop back down to the lower chamber after the bell rings.
Is the High Keep worth revisiting on a second playthrough?
For a clean second run, the High Keep is worth a quick visit if the player is doing a full collection sweep, because the ruin contains a Field Guide page that is easy to miss. For a focused second run, the keep is not a priority, because the gear chest scales with level and the puzzle is the same on every visit.
Does the High Keep change after the main story?
No. The ruin does not change state after the main story, and the puzzle does not unlock a different reward in the postgame. The keep is a static landmark, which is why it is best treated as a quick stop on a wider route rather than a long revisit.
What is the fastest way to clear the High Keep?
The fastest clear is to land in the courtyard, defeat the encounter, loot both side chambers, ignite the movable block, carry the burning block through the brazier chain, drop down to the reward room, and leave through the lower courtyard exit. The full sequence takes a few minutes, and the main time sinks are the puzzle reset risk and the side chamber loot.
Leave a Reply