
Sterilization chamber safe code: where to find it in Resident Evil Requiem
The sterilization chamber safe code is one of the small puzzles tucked inside the ARK segment of Resident Evil Requiem. The safe itself sits in a room full of broken glass, patrolling Lickers, and a gurney-bound zombie that can wake up if the player moves carelessly, so reaching it already feels like half a puzzle. The combination is not visible on a first visit, which is why a lot of players leave the chamber empty-handed, push forward into the connected wings, and then return once the in-game clue file is in hand. The contents on standard difficulty are modest, but they land at a point in the campaign where a Molotov and a Med Injector can change how the next encounter plays out, so understanding the order of operations matters as much as the digits on the dial.
This walkthrough covers the safe’s location, the file that holds the code, the route that keeps combat to a minimum, and what the safe contains on different difficulty settings. It also looks at why Capcom builds small puzzles like this one the way it does, the design tension between mandatory and optional rewards, and how level design quietly steers the player toward the right path without obvious signposting. Players who only want the digits can jump to the dedicated section, but the surrounding context explains why the puzzle is paced the way it is, and why skipping it is a perfectly defensible choice on a first run.
Where the sterilization chamber safe is located in the ARK
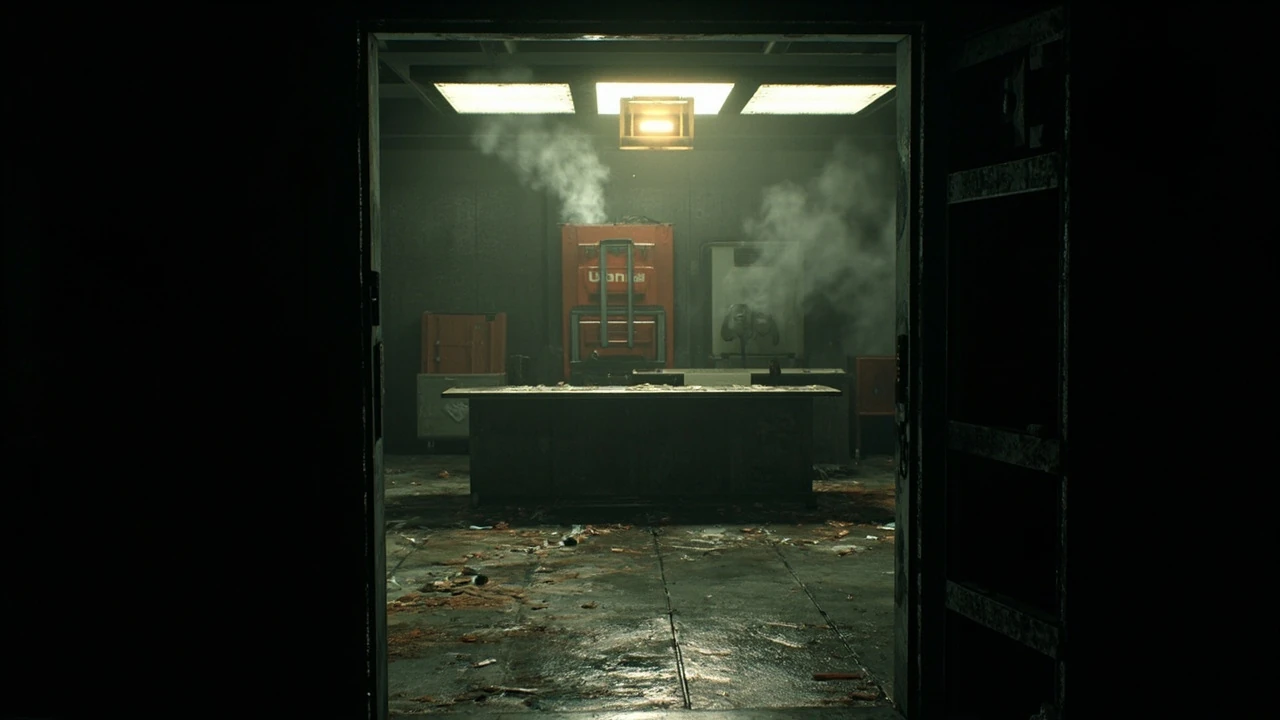
The safe is on the counter in the northeast corner of the sterilization chamber, directly under a window that looks into the chemical storage area. According to the IGN walkthrough of the room, the player has to approach carefully because the floor around the counter is littered with broken glass. Stepping on that glass produces enough noise to agitate the nearby Lickers, which is the main reason the room feels dangerous even before any puzzle is solved and why so many first visits end with the player retreating back through the door they entered from.
The room has two exits that matter. The west exit leads past a gurney with a sleeping zombie, and the main door is the one the player usually comes through. The walking route the player takes influences which threat is active when, because the Lickers’ patrol lines cross the broken glass section. The path through the chamber is short, but the design rewards a slow, deliberate approach over a sprint-and-shoot mentality, which is consistent with the wider pacing of Resident Evil Requiem’s mid-game laboratory sections where every room is tuned to punish noise.
The chemical storage area visible through the window is not the same room as Bioweapon Repository 05, and it is easy to confuse the two on a first pass. The window is a piece of environmental storytelling that signals the lab is part of a larger interconnected complex, but it is not itself a doorway, and the file the player needs is on the other side of the facility, not behind the glass.
Why the safe appears locked on the first visit
On a first visit, the combination dial will not respond to any input the player can realistically guess. The room contains no readable note, no scribbled reminder, and no obvious environmental hint that points to a specific number. This is intentional, and it is one of the most common reasons players leave the area confused, check the documents menu, and find nothing relevant because the file is still sitting in a crate two corridors away.
The level designers are using a two-step gating pattern that has become standard in survival horror. The player sees the lock, explores outward, finds the answer, and then backtracks to use it. That pattern serves several design goals at once. It teaches the player to read the environment carefully, rewards players who sweep every connected room, and prevents the puzzle from being solvable by accident on the first pass. It also creates a natural backtrack that lets the developers reuse the same set pieces with new enemy placements, so the second visit feels tense in a different way rather than simply being a repeat of the first.
It is worth noting that this kind of gating is not unique to Resident Evil Requiem. The series has used a similar pattern since the original mansion, and the broader survival horror genre leans on it because it gives the player a reason to keep exploring rooms that would otherwise feel like filler. The sterilization chamber is one of the cleaner examples in the modern campaign because the backtrack is short and the payoff is immediate.
Where to find the combination code file
The file that contains the sterilization chamber safe code is in the open Umbrella-branded red storage container south of Bioweapon Repository 05. The container is visible from a short distance, but it sits far enough from the chamber that a blind run-through can easily miss it, especially if the player is focused on reaching the next mandatory door. The container is unlocked, so no additional puzzle is required to retrieve the file once the player knows where to look, and there is no lockpick, keycard, or interactive prompt blocking access to it.
When the file is picked up, the combination is added to the player’s documents menu. From that point on, the dial at the safe can be opened by entering the digits in the correct order. The whole round trip usually takes a few minutes of walking, depending on whether the player already cleared the route to Bioweapon Repository 05 or still has to deal with active threats along the way. On a clean run, the backtrack is short enough that the player can collect the file, walk back into the chamber, and open the safe in well under five minutes of real time.
Players who do not want to backtrack twice have the option of reading the file from the menu, walking to the chamber, and opening the safe on the return trip. That single-loop approach is the most efficient if the player is confident the chamber route is clear, because it cuts out the second pass through the broken glass and the gurney section.
Recommended order of operations for the room
The cleanest path is to treat the area as a loop rather than a corridor. The player arrives at the sterilization chamber, surveys the safe and the threats, chooses not to engage, and pushes forward through the west exit toward Bioweapon Repository 05. Along the way, the Umbrella container is checked, the file is read, and then the player turns around and walks back into the chamber. The return trip is where the tension spikes, because the developers can swap the enemy layout on the way back, and a route that was clear on the way out is not guaranteed to be clear on the way in.
A useful checklist for the visit looks like this:
- Crouch before crossing the broken glass near the northeast counter.
- Avoid the gurney zombie on the west side of the room or be ready to retreat if it wakes.
- Continue past the chamber toward Bioweapon Repository 05.
- Open the red Umbrella storage container and read the file inside.
- Return to the chamber, clear a path if necessary, and enter the combination at the safe.
- Loot the contents and leave through either exit depending on the next objective.
This loop works on Casual, Normal, and Hardcore difficulty, although the cost of being heard on the higher settings is steeper because enemy awareness and damage both scale up. On Hardcore, the return trip through the chamber is the part most likely to go wrong, and a single shotgun shell wasted on a Licker can be the difference between a clean run and a restart.
What is inside the sterilization chamber safe
On Casual and Normal mode, the safe contains a Molotov Cocktail, Handgun Ammo, and a Med Injector. None of those items are unique to the safe, so the room is not gating a critical weapon or key item. It is, however, a useful top-up at a point in the campaign where the player is likely to be running low on healing items and basic ammunition, and the Molotov in particular is a flexible tool against the mixed enemy groups that the ARK throws at the player in the next section.
On higher difficulties, the contents scale along with the rest of the loot tables. Fire-based consumables and ammo tend to be more valuable on Hardcore, where every encounter costs more, so opening the safe is more impactful even though the player’s inventory may already be heavier. Players who skip the safe on a first playthrough usually do not notice the missing resources, but players who open it consistently report a smoother difficulty curve through the next two or three rooms, especially on runs where the RNG has not been kind with earlier loot drops.
The contents are not randomized within a single difficulty, so the same three items will be in the safe on every run at Casual and Normal. Hardcore runs may see slight variations in the counts, but the core trio tends to be stable across the entire difficulty range, which makes the safe a reliable planning point rather than a gamble.
Stealth approach versus combat approach in the chamber
Because the chamber is small and the Lickers have excellent hearing, stealth is the lower-risk option. Crouch-walking across the broken glass is the main technique, and players who skip the glass and head straight for the safe will usually alert at least one Licker and burn a shotgun shell they could save for the upcoming arena. The gurney zombie can be left alone entirely, since it only wakes if the player gets close enough to interact with it, and a wide berth around the gurney is enough to keep it dormant.
Combat is viable, but it tends to be wasteful. The Lickers in this room are positioned to ambush the door, so the player either avoids them or has to commit several rounds at close range, and any missed shot tends to bounce off the metal counters and add to the noise problem. Most guides and community runs of the puzzle recommend the stealth path because the loot in the safe is not worth an extended fight, and the resources spent fighting could be used two rooms later against a more scripted threat where the player has less room to maneuver.
For players who want a hybrid approach, the safest compromise is to crouch through the chamber on the way to the file, then use a single well-placed shot to thin out any Licker that has wandered too close to the safe on the return trip. That keeps the ammo budget reasonable while still clearing a path to the dial.
Common mistakes when solving the puzzle
Players regularly make the same handful of errors in this section. The most common is assuming the safe is bugged because the combination does not seem to do anything, when in fact the file has not been picked up yet. The second most common is missing the Umbrella container entirely because it is partially obscured by a wall, so the player walks past it toward the next mandatory door. The third is opening the safe on a first visit before the code is known, then forgetting the room and never returning, which is a small but real resource loss over the course of a campaign.
A short diagnostic table helps separate these from real bugs:
| Symptom | Likely cause | What to check first |
|---|---|---|
| Dial spins freely with no click | Combination file not yet collected | Open the documents menu and look for the ARK combination note |
| Lickers attack the moment the player enters | Broken glass was stepped on | Crouch before crossing the glass near the safe |
| Zombie on the gurney wakes up | Player moved too close to the gurney | Keep distance and take the opposite exit |
| Umbrella crate appears empty | Wrong container opened or a previous save reopened it | Verify the container is the one south of Bioweapon Repository 05 |
Each of these has a clear, low-cost fix. None of them require restarting the chapter or reloading an older save, which is the kind of forgiving design players expect from a modern survival horror title. The most common one, the missing file, is also the easiest to confirm because the documents menu is searchable and the combination note has a distinctive title that matches the safe’s location.
How this puzzle fits the wider level design of the ARK
The sterilization chamber sits in a transitional stretch of the ARK where the game shifts from exploration to combat pressure. The previous rooms are quieter and reward the player for thorough searching, while the rooms after the chamber reintroduce larger enemy groups and scripted chase sequences. The safe is a midpoint reward that asks the player to keep exploring carefully at exactly the moment the temptation to rush is highest, and the backtrack to the file is the mechanism that keeps the player moving through the connected wings at a pace the developers want.
From a level design perspective, the puzzle is a textbook example of the see-it, leave-it, return-for-it pattern. The player sees the lock, registers that it cannot be opened yet, explores the connected area, finds the information, and comes back. The developers reinforce the pattern by placing the clue in a different biome, the bioweapon repository, rather than in the same room, which forces the player to engage with at least one new threat on the way to the answer. That extra engagement is not incidental; it is the point, because the file would feel like busywork if it were sitting on the same counter as the safe.
The chamber also serves as a soft tutorial for the Licker AI, which is more aggressive here than in the rooms that come before. Players who learn to crouch through broken glass in this room carry that habit into the rest of the ARK, and the design is set up so that the lesson lands without a single line of explicit instruction.
Why Capcom gates a small reward with a backtrack
Gating a Molotov and some ammo behind a backtrack is a deliberate design choice. It teaches the player that the ARK rewards thoroughness without locking essential progression behind optional exploration. The game can be completed without ever opening the safe, but players who open it consistently are rewarded with smoother combat and fewer healing shortages in the next segment, and the design is calibrated so that the reward is meaningful without being essential.
This is one of the design philosophies that Resident Evil Requiem inherits from earlier entries in the series. Survival horror games in this lineage tend to place useful but non-critical items in locations that require a small extra effort, on the theory that the player’s own curiosity should drive the side content rather than a quest marker. The sterilization chamber safe code is a clean example of that philosophy in a single small room, and it is one of the reasons the ARK feels denser than its actual square footage suggests.
There is also a narrative justification buried in the level design. The Umbrella container south of Bioweapon Repository 05 is a piece of environmental storytelling that ties the safe to the broader bioweapon program, and the file itself is a small reminder that the facility is still operating on internal documentation even after the events that turned it into the nightmare the player is walking through. The puzzle is doing two jobs at once: it gates a reward, and it reinforces the setting.
Inventory and resource planning around the safe
Players who plan their inventory before entering the chamber tend to do better in the next section. Opening the safe is most valuable when the player is low on healing and has at least one firearm with spare ammo, because the encounter that follows the chamber is usually a checkpoint with a tight resource budget. A simple pre-entry checklist helps:
- Confirm at least one healing item remains for emergencies.
- Keep a firearm with five or more rounds for the return trip.
- Avoid using a Molotov Cocktail in the chamber itself and save it for the next arena.
- Make sure the documents menu has been read after collecting the file.
These are not hard requirements, but they reflect how the encounter is tuned on Normal difficulty. Players on Hardcore benefit even more from this kind of pre-check, because one wasted med kit or one missed ammo pickup can cascade into a death later in the same chapter. The chamber is forgiving enough that a sloppy approach will usually still let the player through, but the section after it is less forgiving, and the safe is a cheap insurance policy against the worst-case resource spiral.
It is also worth thinking about the order in which the contents are used. The Med Injector is the most flexible pickup because it works in any state, while the Handgun Ammo is most valuable if the player is running a handgun-focused build. The Molotov is the item most likely to be saved for the next encounter, because the chamber itself does not have a tight cluster of enemies that would benefit from area-of-effect fire damage.
Comparison with other Resident Evil Requiem safe puzzles
The sterilization chamber safe is one of several combination puzzles in the ARK. Compared with the others, it is mid-difficulty: the route is short, the clue is in a clearly marked container, and the room itself contains the standard mix of audio and visual hazards. Other safes in the chapter either sit in higher-traffic corridors or require clues from NPCs and notes in different wings of the facility, and the difficulty curve tends to climb as the player moves deeper into the lab.
A quick comparison helps frame what makes this particular puzzle distinctive:
| Puzzle | Location of clue | Main environmental hazard | Optional or required |
|---|---|---|---|
| Sterilization chamber safe | Umbrella crate south of Bioweapon Repository 05 | Lickers and broken glass | Optional |
| Staff locker safe (chapter example) | Medical records room | Patrolling zombie | Optional |
| Lab supervisor safe (chapter example) | Office wing | Camera-monitored corridor | Optional |
The pattern across the chapter is consistent: optional safes, environmental hazards that punish rushing, and clues that are placed in rooms the player has reason to visit for other reasons. Recognizing the pattern makes the later safes in the chapter easier to solve, because the player starts to expect the backtrack before reading any notes, and that expectation is itself a small piece of design feedback that the developers are deliberately training into the player.
What players should do if the safe still will not open
If the combination has been read and the dial still does not respond, a few targeted checks usually resolve the issue. The most common cause is that the document is in the notes tab but the player has not scrolled to the correct page, so the combination itself is missing from view. Another is that the player is rotating the dial in the wrong direction, because Resident Evil Requiem safes require left-then-right input for the first two digits and a final left turn for the last digit, similar to the long-running safe convention used across the series.
A third possibility is that the player has the file from a different safe in the same chapter, and the documents menu is showing the wrong note. Each safe in the ARK has its own entry, and the titles are similar enough that it is easy to read the wrong one in a hurry. Cross-referencing the safe’s location with the note’s title is the fastest way to rule this out.
If none of those resolve the problem, a reload to the last manual save usually does. Because the safe is purely optional and the contents are not required to progress, a stuck puzzle is at worst an inconvenience rather than a blocker. There is no achievement or trophy tied specifically to the sterilization chamber safe contents, so the only cost of skipping it is the lost resources, and even that loss is recoverable on the next save file.
Design lessons from a small puzzle
The sterilization chamber puzzle is a useful case study for anyone interested in survival horror level design. It shows how a small room can carry a full encounter loop in roughly five minutes of gameplay, including the reveal, the backtrack, the return, and the reward. It also shows how audio cues like the sudden activation of the sterilizer on entry contribute to the jump-scare atmosphere without breaking the puzzle itself, because the noise is purely scripted and does not gate the dial.
For developers, the puzzle illustrates a few principles that translate well beyond a single room. Optional content should still feel meaningful, and the contents have to be valuable enough to justify the backtrack without being essential enough to feel like a hidden requirement. The player’s curiosity should be the main engine of side content, not a checklist pinned to the pause menu. Environmental storytelling can do the work of a tutorial without a single line of explicit instruction: the broken glass tells the player to crouch, the file’s location tells the player to backtrack, and the safe’s contents tell the player that the effort was worth it.
It is also a useful example of how to scale optional content across difficulty. The same room, the same safe, and the same code work on every setting, but the value of the contents changes as the player’s resource budget tightens, and the cost of a wasted attempt rises with each tier. That scaling is what makes the puzzle feel fair to both casual players and to players pushing for a Hardcore clear.
Frequently asked questions
What is the sterilization chamber safe code in Resident Evil Requiem?
The exact digits are listed in a file found in the open Umbrella-branded red storage container south of Bioweapon Repository 05. The combination is automatically added to the player’s documents once the file is read, and the safe can then be opened in the northeast corner of the sterilization chamber. Players who want the precise numbers should consult the in-game document rather than relying on memory, because the code is treated as canonical only through the document itself, and the dial will not accept input until the file is in the menu.
Where is the sterilization chamber safe located?
The safe is on the counter in the northeast corner of the sterilization chamber, directly under the window that looks into the chemical storage area. The floor in front of the counter is covered in broken glass, and the room is patrolled by Lickers that respond to noise, so a slow crouching approach is recommended over a sprint.
Do I have to open the sterilization chamber safe to progress?
No. The safe is optional, and the campaign can be completed without ever opening it. The contents are a Molotov Cocktail, Handgun Ammo, and a Med Injector on Casual and Normal difficulty, which is a useful top-up but not a critical piece of progression, and there is no story beat or unlock tied to opening it.
Can the safe be opened on a first visit to the chamber?
No. The combination file is not available until the player has explored the area south of Bioweapon Repository 05. The level is designed so that the player will need to backtrack to the chamber after collecting the file, which also gives the developers a reason to reposition enemies on the return trip and keep the second visit from feeling like a repeat of the first.
What difficulty is the sterilization chamber safe designed for?
It is available at every difficulty, but the value of the contents scales with the difficulty. On Casual and Normal, the items help smooth out the next few encounters. On Hardcore, where healing and ammo are scarcer, the safe becomes a higher-impact pickup that can change how the next combat arena plays out, and skipping it is a more noticeable resource loss.
Why is the room so loud when I enter it?
The sterilizer unit activates with a sudden burst of steam and noise, which is a scripted jump scare designed to startle the player. The noise is purely atmospheric and does not affect gameplay, but it is one reason many first-time players enter the room with a weapon raised and miss the file location on the way to the safe.
Is the zombie on the gurney dangerous?
It can be. The zombie remains dormant as long as the player keeps a safe distance, but it will wake up and attack if approached too closely. Players who want to avoid the encounter should ignore the gurney entirely and head for the opposite exit, because the loot in the safe does not require going near the gurney at any point.
What happens if I open the safe before reading the file?
The combination will not work, and the player will be told that the dial cannot be opened. There is no glitch or soft lock associated with this; the game simply requires the document before the safe can be interacted with. Returning to the Umbrella container and reading the file will resolve the issue on the same playthrough without needing a reload.
Are there other safes like this one in the ARK?
Yes. The ARK contains several optional safe puzzles, each with its own clue location and environmental hazard. They follow the same see-it-leave-it-return pattern, so players who solve this one cleanly will usually find the others easier by comparison, because the muscle memory of the crouch approach transfers from one room to the next.
Do I lose anything by skipping the safe entirely?
Only the items inside. There is no achievement, trophy, or story beat tied to the safe’s contents, and the campaign does not change based on whether it was opened. Skipping it is a perfectly valid choice for players who prefer to conserve ammo and avoid the broken glass section altogether, especially on higher difficulties where every encounter is more expensive.
Leave a Reply