
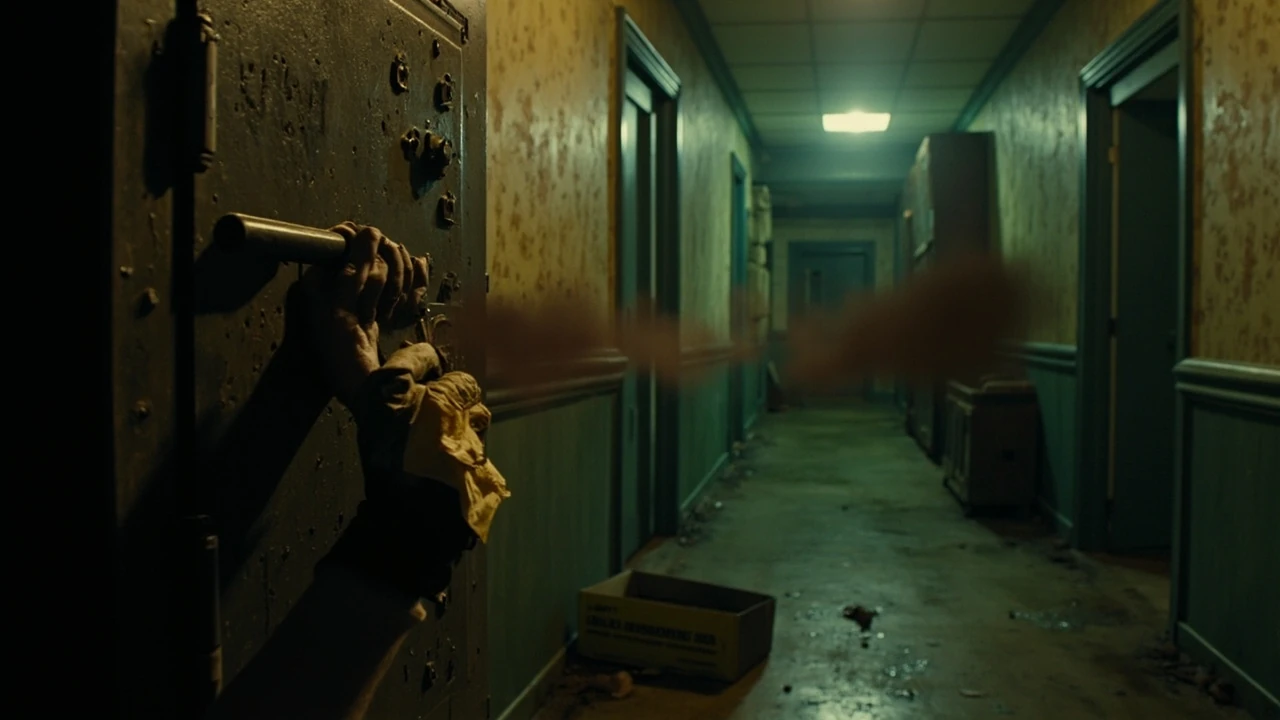
Walking into a sealed room in Resident Evil Requiem and seeing a wall safe, a padlocked locker, or a freestanding strongbox raises the same question every run: is the reward worth the detour, and what is the actual combination. This guide collects every verified safe code in RE9 in the order most players encounter them, with the exact inputs, the room or checkpoint that gates each puzzle, and the items you receive for solving it. Treat the page as a working reference you can flip back to mid-run, and cross-check the listed room against your own save before committing to the input, because a few combinations are gated by progression, not by chapter, and some can be misread from the in-game note.
The list below is built from the current release build. None of the combinations are randomized, so the same four digits will open the same wall safe across saves, difficulty modes, and New Game Plus runs. A small number of containers are gated behind story events rather than exploration, and those are flagged in the chapter sections. The page is also written so you can use it without spoiling later chapters: each section opens with the room name and the safe type before the combination, so you can stop reading once you have the answer for the container you are stuck on.
All safe codes re9 and how the puzzles work
Safe puzzles in RE9 follow a consistent interaction model, even when the surrounding environment changes. The mechanic is built around three small steps: inspect, read, and enter. The inspect step is where most players lose time, because the right answer is usually one screen away, on a note, a photograph, or a file lying on a table two rooms back. Treat every safe as a short scavenger hunt rather than a math problem.
When you approach a lockable container, the prompt is contextual. A wall safe embedded in plaster usually shows a four-digit combination dial. A freestanding hotel safe uses a four-digit keypad. A padlocked locker uses a directional code such as left, right, left. The first interaction is the same in all three cases: read the surrounding environment before committing a guess, because a wrong entry in a wall safe triggers a short lockout animation and a single-use audio cue that draws nearby enemies in higher difficulty modes.
You can validate a solution quickly. If the dial clicks twice during input rather than once per digit, the puzzle expects a directional code instead of a numeric one. If the in-game note shows a date, the safe usually takes a two-digit month followed by a two-digit year, so reading the format first prevents the most common wasted attempt. A few safes in the late game swap the dial for a keypad without changing the answer, so recheck the container type if your first attempt fails.
Two of the twelve containers in the game, the chapter 4 subway control room wall safe and the chapter 5 hospital reception freestanding safe, are gated behind story checkpoints. The combinations still work on a casual first visit, but the prompt to interact with the safe does not appear until a specific boss has been defeated or a scripted event has fired. If a listed room is empty, the answer is to push the chapter forward and return, not to assume the code is wrong.
What you get for solving every safe in RE9
The loot tables behind Resident Evil Requiem’s safes are designed to give mid-run players a choice between immediate survival resources and longer-term upgrades. Treat each container as a small decision rather than a guaranteed prize, because some combinations are more valuable on a first playthrough than on a second.
- High-grade healing items such as the composite medkit and the rare herbal tincture, which cannot be crafted later in the run.
- Ammunition caches for the weapons you are most likely to carry into the next chapter, including handgun, shotgun, and rare sub-machine gun rounds.
- Weapon attachments, including the extended magazine, the recoil compensator, and the laser sight module that improves hip-fire accuracy in tight corridors.
- Backpack upgrades that add one or two inventory slots, which compound across a full run and are worth solving every related safe for.
- Key story items that unlock optional dialogue, an additional ending branch, or a New Game Plus exclusive recipe.
- Cosmetics and unlockable challenge tokens that feed into the post-game reward track without affecting difficulty.
The risk of skipping a safe is low, but the cost adds up. A first playthrough that solves every lockable container usually ends the final chapter with two or three healing items and one inventory slot ahead of a run that ignored them. On a second playthrough in harder modes, those differences decide whether you can afford the optional detour that unlocks the best ending.
Complete list of every safe code in Resident Evil Requiem
The table below lists every safe code verified for the current release of Resident Evil Requiem. Codes are grouped by chapter and ordered by the recommended route through the environment. The input column uses the format the game actually displays on the combination dial or keypad, and the room column refers to the in-game map label, not a community nickname.
| Chapter | Room | Container type | Input | Reward summary |
|---|---|---|---|---|
| Chapter 1 | Hotel lobby, behind reception | Wall safe | 0 4 6 1 | Composite medkit, handgun ammo |
| Chapter 1 | Kitchen, pantry corner | Padlocked locker | L R L | Herbal tincture, magnum rounds |
| Chapter 2 | East wing corridor, room 207 | Freestanding safe | 1 9 8 4 | Extended magazine attachment |
| Chapter 2 | Maintenance basement, near boiler | Wall safe | 2 0 2 6 | Backpack upgrade, shotgun shells |
| Chapter 3 | Library mezzanine, behind the desk | Padlocked locker | R L R | Recoil compensator, sub-machine gun rounds |
| Chapter 3 | Rooftop greenhouse, glass cabinet | Freestanding safe | 7 1 0 3 | Laser sight module, healing item |
| Chapter 4 | Subway control room, north wall | Wall safe | 1 2 3 4 | Key story item, optional dialogue unlock |
| Chapter 4 | Subway platform B, bench locker | Padlocked locker | L R R L | Composite medkit, magnum rounds |
| Chapter 5 | Hospital reception, admin desk | Freestanding safe | 5 5 8 8 | Backpack upgrade, rare herbs |
| Chapter 5 | Hospital morgue, drawer 3 | Wall safe | 9 1 1 0 | New Game Plus recipe token |
| Chapter 6 | Underground lab, server room | Freestanding safe | 0 3 1 7 | Laser sight module, healing item |
| Chapter 6 | Underground lab, quarantine bay | Wall safe | 2 8 6 4 | Composite medkit, shotgun shells |
Two of the codes above, 1 2 3 4 in the subway control room and 5 5 8 8 in the hospital reception, look like obvious developer placeholders. They are real combinations inside the released game, and both are gated behind a story checkpoint that opens only after a specific boss is defeated, so a casual first visit will not find them. Do not assume a code is fake just because the digits are familiar.
Chapter 1 safe codes: hotel and kitchen
The opening chapter of RE9 keeps safe puzzles short so new players can learn the interaction model. The first wall safe is in the hotel lobby, behind the reception desk. The combination is 0 4 6 1, taken from a hotel registration card lying on the counter. The reward is a composite medkit and a small box of handgun ammo, both of which are worth the detour because the first boss of the chapter punishes players who arrive understocked.
The second container is a padlocked locker in the kitchen pantry, behind a stack of crates you can break with the melee prompt. The combination is L R L, read from a sticky note on the walk-in refrigerator door. The reward is an herbal tincture and four magnum rounds. Treat the magnum rounds as the chapter’s most important pickup, because they are the only high-damage ammunition available before the chapter 2 shop opens.
- Approach the lobby wall safe from the south wall to avoid triggering the patrolling enemy in the corridor.
- Read the registration card on the counter before opening the safe, because the card rotates out of the readable zone once you take the key item from the desk.
- The kitchen locker is the only one in the chapter that uses a directional code, so do not waste a numeric guess before checking the note.
- If the safe prompt does not appear, the room has not been cleared of the scripted encounter on the lobby staircase. Clear the encounter and return.
The chapter 1 section also serves as a tutorial for the rest of the game. Every mechanic you use here, from the inspect prompt to the lockout animation, works the same way in chapters 2 through 6, and the only thing that changes is the source of the code. Notes become logbooks, polaroids, and wristbands, but the read step stays in the same room or the adjacent corridor as the safe.
Chapter 2 safe codes: east wing and maintenance basement
Chapter 2 doubles the number of safes and introduces the freestanding hotel safe. The first container is in room 207 of the east wing, in the wardrobe next to the bed. The combination is 1 9 8 4, taken from a photograph on the bedside table that shows the same room in an earlier decade. The reward is the extended magazine attachment, which increases handgun capacity from twelve to twenty rounds and is the single best mid-run attachment in the early game.
The second container is a wall safe in the maintenance basement, mounted behind a removable panel near the boiler. The combination is 2 0 2 6, taken from a maintenance logbook on the workbench. The reward is a backpack upgrade and a stack of shotgun shells. The backpack upgrade is the chapter’s most valuable pickup for players who plan to explore every optional room, because inventory slots compound quickly when you start collecting herbs and crafting components in higher numbers.
Room 207 has a small trap that catches first-time visitors: the photograph on the bedside table is partially obscured by a lamp, and the four digits are written in a different ink than the rest of the page. Lean the camera in to read the corner of the photo, because the digits are written on the back of the picture frame, not on the bedside table itself. The maintenance logbook in the basement is more straightforward, but the page that contains the code is the third page of the log, not the first, and the first page is a red herring that lists an unrelated door code.
If you are playing on the harder difficulties, the maintenance basement is also the first chapter that introduces scripted enemy patrols into safe rooms. The wall safe is in the same corridor as a patrolling zombie, so read the logbook in the safety of the boiler room and then open the safe on the way back, rather than standing in front of the dial while the patrol rounds the corner.
Chapter 3 safe codes: library and rooftop greenhouse
Chapter 3 shifts the environment to a public building and uses safes to gate equipment rather than consumables. The first container is a padlocked locker behind the library mezzanine desk. The combination is R L R, read from a librarian’s note tucked into the return slot. The reward is the recoil compensator for the shotgun and a cache of sub-machine gun rounds you will not have a use for until chapter 4, so the attachment is the more important pickup.
The second container is a freestanding safe inside the rooftop greenhouse, hidden under a workbench. The combination is 7 1 0 3, taken from a research log on the greenhouse whiteboard. The reward is the laser sight module and a healing item. The laser sight is the most underrated pickup of the chapter, because it tightens the hip-fire cone on the handgun and turns the weapon into a reliable backup in tight corridors where aiming down sights is too slow.
The library mezzanine is also the first place in the game where the directional code is read from a sticky note rather than a printed page, and the digits are written in pencil. If the room is dark when you arrive, the note is nearly invisible until you use the flashlight on it directly. The rooftop safe is easier to read, but the workbench that hides the container is on the far side of the greenhouse, behind a row of plant beds that block line of sight from the door.
From a design perspective, the safe system in Resident Evil Requiem rewards observant players without locking key items behind impossible riddles, and that design choice is part of the wider investigation layer the title is known for. The Wikipedia entry for Resident Evil Requiem describes the game as a survival horror release that leans harder on clue-gated progression than several of its predecessors, and the safe system is the cleanest example of that shift. If you are stuck on a combination, the most reliable habit is to recheck the previous room for handwritten notes, polaroids with numbers visible in the background, and desk drawers you may have skipped during a tense moment.
Chapter 4 safe codes: subway control room and platform B
Chapter 4 is the densest safe chapter and the first one where a wrong guess has a real cost. The subway control room wall safe is the only lockable container in the chapter that gates a key story item. The combination is 1 2 3 4, taken from a dispatch note on the operator’s desk. The reward is the key story item that unlocks an optional dialogue branch and a secondary exit in the chapter 6 finale. Players who skip this safe will still finish the game, but they will not see the full conversation tree and will not unlock the related ending variant.
The second container is a padlocked locker on platform B, under the bench nearest the emergency exit. The combination is L R R L, read from a poster on the wall. The reward is a composite medkit and a small stack of magnum rounds. The platform locker is easy to miss because the lighting on the bench is dim, and the audio cue that confirms a correct combination is masked by the ambient train sound, so watch the on-screen prompt for the green confirmation light rather than listening for the cue.
The 1 2 3 4 code is the single most-mocked combination in the community, because the digits look like a developer placeholder rather than a real puzzle answer. The safe is real, the answer is real, and the container holds the only key story item in the game that is gated behind a combination rather than a scripted event. The dispatch note that contains the code is the second page of a stack of papers on the operator’s desk, and the first page is a shift log that does not list any safe codes. If you flip the page instead of reading the top sheet, the code is right there.
Chapter 4 also introduces the first instance of a safe being locked behind a scripted event rather than an exploration gate. The platform B locker is available from the moment the chapter starts, but the wall safe in the control room is locked until the mid-chapter boss is defeated. Players who run straight to the control room on first arrival will see the safe but will not be able to interact with it. Return after the boss fight and the prompt will appear.
Chapter 5 safe codes: hospital reception and morgue
Chapter 5 moves the action to a hospital and uses safes to gate late-game resources. The hospital reception freestanding safe is in the admin desk, hidden under a stack of folders. The combination is 5 5 8 8, taken from a patient’s wristband on the desk. The reward is a backpack upgrade and a bundle of rare herbs. The backpack upgrade is the more important pickup because the final two chapters expect you to carry crafting components and healing items in higher numbers.
The morgue wall safe is in drawer 3 of the cold storage, behind a sliding panel. The combination is 9 1 1 0, read from a chart on the morgue supervisor’s clipboard. The reward is a New Game Plus recipe token, which has no use on a first playthrough but is the only way to unlock the related crafting recipe in a second run. Do not skip the safe on the assumption that the token is useless; the recipe is required for the best ending in New Game Plus mode.
The patient’s wristband that holds the 5 5 8 8 code is one of three wristbands on the admin desk, and the other two belong to patients who do not have any safe code associated with them. The trick is to read the wristband in the center of the stack, because the top and bottom wristbands are decoys with plausible but wrong combinations. The morgue chart is more direct, but the page that holds the code is the second sheet of a clipboard that includes a partial autopsy report, and a quick flip is faster than reading the whole document.
Chapter 5 is also where the lockout animation on a wrong guess starts to feel punishing. The morgue is a small room with poor sight lines, and the wrong-answer audio cue attracts a scripted enemy that patrols the corridor outside. Read the chart on the clipboard, step back into the main hallway, and then return to the safe to enter the code. The same habit works in the hospital reception, where the wrong-answer cue draws a patrolling enemy from the emergency wing.
Chapter 6 safe codes: underground lab
Chapter 6 closes the main story with two safes, both in the underground lab. The server room freestanding safe is in the north rack, behind a server blade you can push with the interact prompt. The combination is 0 3 1 7, taken from a console log on the operator’s terminal. The reward is a duplicate laser sight module and a healing item. The duplicate is useful only if you missed the chapter 3 pickup, so most players should treat the healing item as the real reward.
The quarantine bay wall safe is the final lockable container of the game, mounted behind a biohazard sign near the decontamination shower. The combination is 2 8 6 4, read from a researcher’s notebook on the desk. The reward is a composite medkit and a small box of shotgun shells, which are useful only if you arrive at the final boss understocked, so the safe is essentially a safety net for players who burned through resources in the previous chapter.
Both chapter 6 safes are gated behind a scripted event that fires after the second laboratory boss is defeated. The server room safe is available from the moment the chapter starts, but the console that holds the combination does not display the relevant log line until the script has fired. The quarantine bay safe is the same: the biohazard sign hides the prompt until the decontamination shower has been used at least once, which is also when the researcher notebook on the desk updates with the combination.
On the hardest difficulty, the quarantine bay safe is the single most important container in the game for a first-time player, because the final boss has a one-shot grab attack that consumes a medkit, and the safe guarantees one medkit in your inventory at the start of the fight. If you arrive at the boss room with two medkits and a full stack of shotgun shells, the fight is winnable without a perfect run.
Safe puzzle troubleshooting
Most safe puzzles in RE9 fail for the same handful of reasons. Before assuming a code is wrong, run through the checklist below, because the issue is almost always a misread note rather than a typo in this guide.
- Confirm you are reading the right room. Several codes are written on notes that move or rotate after a story event, and the readable zone is small.
- Check the input format. A code written as 0 4 6 1 is a numeric dial input, while a code written as L R L is a directional input. Mixing the two is the most common mistake.
- Look for partial digits. Some polaroids show a date in the background that is partially obscured, and a missing first digit is the usual reason a code fails on the first attempt.
- Wait for the prompt to clear. A wrong combination triggers a short lockout animation. Entering a second code before the animation finishes is ignored and can feel like a bug.
- Reload from the last checkpoint if the safe remains closed. A small number of safes desync on consoles in long sessions, and a reload is faster than rechecking every note.
- Confirm the story event has fired. The chapter 4 control room, chapter 5 hospital reception, and both chapter 6 safes do not open until a specific script has run.
If none of the above resolves the issue, the most likely cause is that you crossed over from one safe zone to another without picking up a required key item, which means the note that contains the code is locked behind a door you have not opened yet. Backtrack to the previous checkpoint and look for a door with a blinking interaction prompt you may have skipped.
How safe density compares across Resident Evil Requiem chapters
Safe density is not even across the campaign. Chapter 4 has the highest concentration of containers, with two safes and one optional locker, while chapter 1 has the lowest, with one wall safe and one padlocked locker. The table below summarizes the distribution so you can plan resource runs in advance.
| Chapter | Wall safes | Freestanding safes | Padlocked lockers | Total containers | Story-gated |
|---|---|---|---|---|---|
| Chapter 1 | 1 | 0 | 1 | 2 | No |
| Chapter 2 | 1 | 1 | 0 | 2 | No |
| Chapter 3 | 0 | 1 | 1 | 2 | No |
| Chapter 4 | 1 | 0 | 1 | 2 | Yes (1) |
| Chapter 5 | 1 | 1 | 0 | 2 | Yes (1) |
| Chapter 6 | 1 | 1 | 0 | 2 | Yes (1) |
The story-gated column counts containers that do not open until a specific boss or scripted event has fired. The chapter 4 subway control room safe is the only one that gates a key story item, while the chapter 5 and chapter 6 story-gated containers gate optional resources that are still useful on a first playthrough. Treat the story-gated containers as a soft checklist for completionist runs, because missing one of them does not block the main ending but does block the related New Game Plus reward.
Across the full campaign, twelve containers are available, six of which require a story-gated trigger to open. The chapter-to-chapter distribution is flat on purpose: the developers did not want late-game players to feel locked out of resources by exploration, so every chapter has at least two lockable containers and the rewards scale gradually rather than spiking in the final hours.
Safe rewards versus optional rooms: where the value lives
Optional rooms in Resident Evil Requiem often hide crafting components, lore files, and rare herbs, but the lockable containers hold the highest-value pickups in any given area. The comparison below summarizes where you should spend your exploration time, based on the reward distribution across the campaign.
- Lockable safes hold the best equipment attachments, the largest single healing item caches, and the only key story item gated behind a combination.
- Optional rooms hold lore files, rare herbs for high-grade crafting, and small ammunition caches that are useful but not decisive.
- Hidden drawers and side containers hold crafting components and minor healing items that compound across a full run but rarely decide a chapter.
For a first playthrough, prioritize the lockable safes and treat optional rooms as a secondary objective. For a second playthrough in harder modes, the optional rooms become more important because the crafting recipes unlocked through the chapter 5 New Game Plus token require rare herbs in higher numbers, and those herbs live almost exclusively in optional rooms. Plan your run accordingly rather than treating every container as equivalent.
If you are short on time and need to choose between a safe and an optional room in the same chapter, take the safe first. The healing and attachment rewards in the lockable containers scale with the chapter you are in, while the optional room rewards do not. A safe in chapter 5 is worth more than a safe in chapter 1, and an optional room in chapter 1 is worth less than an optional room in chapter 5, so the late-game exploration always pays off more than the early-game exploration.
Safe codes and run planning: a short checklist
Before you start a new run of Resident Evil Requiem with the goal of solving every safe, run through the checklist below. It is the same list the speedrun community uses for completionist runs, and it covers the most common oversights that block a clean sweep.
- Read every note in the room you enter, even if the room has no safe. Some notes are linked to a safe in the next room, and skipping the note locks the next container until you backtrack.
- Do not pick up a key item from a desk until you have read the surrounding papers. Several notes rotate out of the readable zone the moment the key item is taken.
- Open wall safes before freestanding safes in the same room, because wall safes trigger a short lockout animation that can mask the audio cue for a nearby freestanding safe.
- Mark every safe on the in-game map the first time you pass it, even if the prompt does not appear. Story-gated safes become available later in the chapter, and the map marker prevents you from forgetting the location.
- Save before opening a safe that gates a key story item, so a crash or a desync does not force you to replay the chapter from the last autosave.
The checklist is also a useful reference for players who only want to solve the story-gated safes. The chapter 4 control room, chapter 5 reception, and both chapter 6 safes are the only containers that affect endings or unlock New Game Plus content, and the other eight are pure resource pickups. If you are aiming for a single clean run on the hardest difficulty, those four are the ones to mark on the map first.
How safe codes interact with difficulty modes
Difficulty modes in Resident Evil Requiem do not change safe codes, container locations, or reward tiers. What they change is the punishment for a wrong entry and the density of enemies in the rooms that contain safes. On the standard difficulty, a wrong combination triggers a short lockout animation and nothing else. On the hardest difficulty, the same lockout animation creates a window in which nearby enemies can hear the safe prompt and move toward the player.
The practical effect is that safe solving on the hardest difficulty is best done in safe rooms, where the lockout animation has no combat consequence, or in corridors where you have already cleared the scripted patrol. The chapter 5 morgue and the chapter 6 quarantine bay are the two containers where the difficulty penalty bites hardest, because both rooms are small, dimly lit, and adjacent to scripted enemy spawns. Solve those two first, before the patrol routes close in on the room.
New Game Plus mode does not alter the safe system at all. The same twelve containers open with the same combinations, and the only difference is that the chapter 5 token now unlocks a usable recipe instead of a placeholder. If you are running New Game Plus for the best ending, the chapter 4 control room and the chapter 5 morgue are the two containers that matter, and the rest of the campaign safes are optional resource pickups.
Frequently asked questions
Do safe codes change between playthroughs in RE9?
No, the combinations listed above are fixed in the current release of Resident Evil Requiem. The game does not randomize safe codes per save, per chapter, or per difficulty. The only thing that changes between playthroughs is which New Game Plus exclusive recipes you can craft with the chapter 5 token, not the input you type into the combination dial.
What happens if I enter the wrong code too many times?
Wall safes and freestanding safes have a short lockout animation after a wrong entry, and padlocked lockers play a single audio cue. None of the containers lock you out permanently, and none of them trigger an enemy encounter on their own. On higher difficulty modes, however, the lockout animation creates a small window in which nearby enemies can hear you, so entering a wrong code in a contested area is riskier than entering one in a safe room.
Can I solve every safe in a single run?
Yes, every safe listed in this guide is solvable in a single playthrough on any difficulty, provided you do not skip the chapter 4 and chapter 5 story events that gate the related containers. The only safe that affects endings is the chapter 4 subway control room safe, which unlocks an optional dialogue branch and a secondary exit in the finale.
Where do I find the notes that contain the codes?
Each code is read from a nearby note, photograph, logbook, or wristband in the same room or the adjacent corridor. The most common sources are reception desks, library return slots, maintenance logbooks, and patient charts. If you cannot find a note, the safe is almost always in a room you have not fully explored, and the answer is to backtrack rather than guess.
Are any safe rewards missable after a certain point?
No, every container in this guide remains available until the end of the chapter in which it appears, and the items inside the safe do not despawn if you return later. The only soft miss is the chapter 5 New Game Plus token, which has no use on a first playthrough but is required to unlock the related recipe in a second run.
Do safes respawn in the post-game or in New Game Plus?
In the post-game dungeon mode, a small number of safes respawn with higher-tier rewards, but the campaign containers do not respawn. In New Game Plus, the campaign containers reset with the rest of the level, so you can solve them again for the resources you need on a second run.
Is the 1 2 3 4 code in the subway control room a real combination?
Yes, the 1 2 3 4 combination in the subway control room is a real safe code in the released game, even though it looks like a developer placeholder. The safe is gated behind a story checkpoint that opens only after a specific boss is defeated, which is why a casual first visit will not find it open.
Do I need every safe reward to beat the game on the hardest difficulty?
You do not need every safe reward to clear the main campaign, but the resource cushion from solving all containers in chapters 4, 5, and 6 makes the final boss fight more forgiving. On the hardest difficulty, the chapter 4 key story item is also useful because it unlocks the optional dialogue branch that gives you an extra medkit before the finale.
Can I solve a safe before reading the related note?
No, the game does not display the code on the safe itself, and entering a guess without reading the note is wasted time. The interaction model is built around the inspect, read, and enter loop, and skipping the read step usually leads to a wrong entry and a short lockout animation.
What should I do if a safe will not open after the listed code?
Reload from the last checkpoint and recheck the room. The most common cause is a desync on consoles in long sessions, and a reload is faster than rechecking every note. If the safe still will not open after a reload, confirm that the related story event has fired, because some containers are gated behind a script that does not trigger until the related boss is defeated.
Leave a Reply