
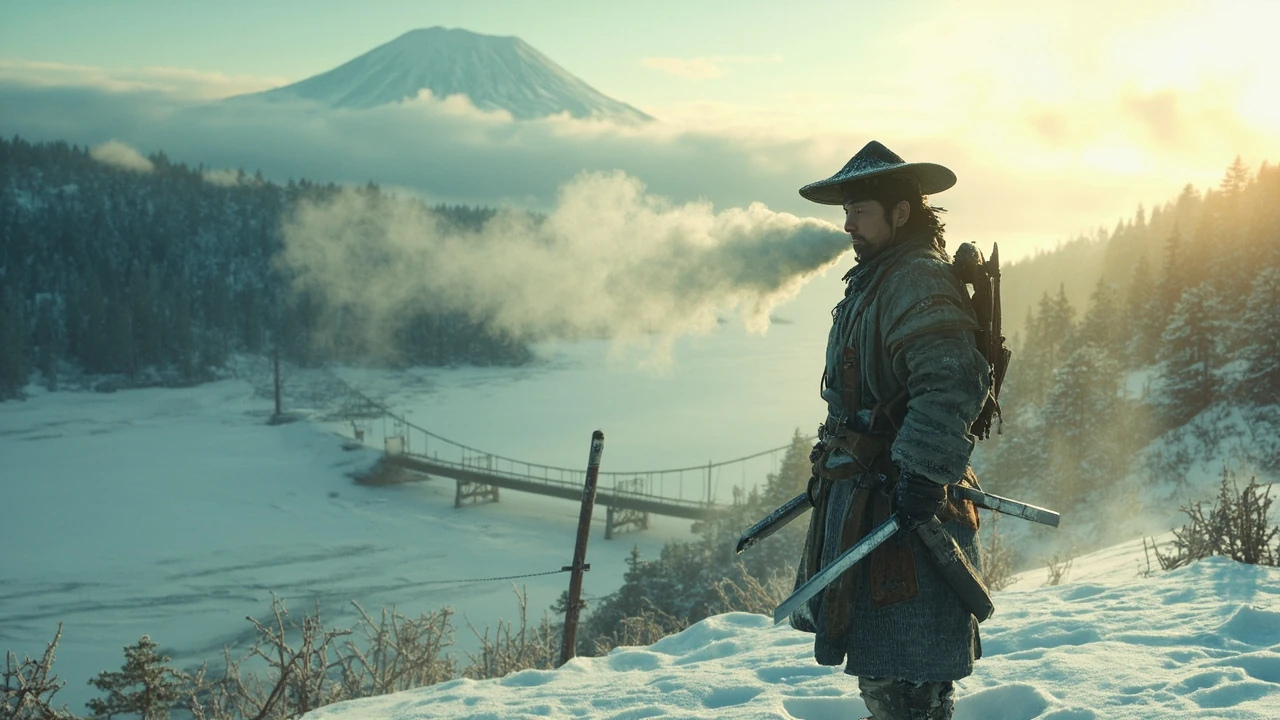
Ghost of Yotei walkthrough: how to plan your journey through Ezo
A reliable ghost of yotei walkthrough has to do more than list quest names. Sucker Punch’s open-world follow-up to Ghost of Tsushima drops players into a much larger, less populated stretch of northern Japan, and the design choices the studio made for that map affect every decision a player makes: which bounty to chase first, whether to ignore a fox den, when to swap stances, and how aggressively to spend hard-earned coins on armor dyes versus weapon upgrades. This walkthrough is written for players who want a single, defensible route through the campaign and the open-world activities around it, plus the underlying mechanics that explain why the recommended order works. The advice below combines confirmed design information from the developer, the structure of the world map, and practical patterns that hold up across the early, mid, and late game on a normal difficulty save.
Because ghost of yotei is a single-player open-world action game, the walkthrough is closer to a structured tour than a rigid route. Players who want a chronological main-story path can follow the act breakdown below. Players who want to see everything on the map can use the regional and resource tables to plan loops that respect level and gear gates. The key principle is the same in both cases: identify the activity, check the suggested combat and exploration level, gather the prerequisites, and then execute the simplest reliable plan before chasing optional objectives. The rest of the article expands each of these steps with concrete numbers, regional examples, and the reasoning that turns a list of tasks into a route a first-time player can actually follow.
How the open world is structured
The map in ghost of yotei is split into named regions around Mount Yotei in northern Japan. The player begins in a snowy coastal area and gradually unlocks access to inland forests, highland plateaus, and remote villages. Each region has its own encounter types, vendors, and side content. Sucker Punch’s open-world structure rewards players who think of regions as difficulty tiers rather than pure geography: a recommended combat level generally appears when a player gets close to a new area’s main gate, and most of the optional content under that gate scales around the player once the act of the main story that introduces the region is complete.
Three structural points matter before you start a walkthrough route:
- Mount Yotei is the visual and mechanical center. Roads and fast-travel points radiate outward, and many side activities are placed along the routes between settlements rather than inside them.
- Many camps and hamlets act as soft level gates. Their quest givers may be available early, but their quests typically recommend a higher combat or exploration level than the player’s current gear can comfortably clear.
- Open-world activities are tagged with the same icons the studio used in Ghost of Tsushima, but the density and behavior of each activity type are tuned differently. Bounties, duels, and legendary hunts are rarer and harder than comparable content in the earlier game, and the rewards are scaled to match.
The reason these structural points matter for a walkthrough is that the map rewards slow, deliberate exploration more than wide, sweeping clears. A player who tries to complete a region in a single session will run into the same problems: under-leveled charms, missing traversal tools, and bounties that are technically available but tuned for a character with better gear. The walkthrough order below keeps the player at the front edge of each region’s recommended level, which is the position from which the open world is the most fun to play.
Core systems you need to understand before following any route
Every ghost of yotei walkthrough assumes the reader already knows the basic verbs: attack, dodge, parry, and use a stance. The more important decisions in this game happen one layer up, where the player chooses which tools to bring into a fight and which resources to invest in before the next region opens. The systems below are the ones that most often force a restart or a refund of a quest, and they are also the systems a player should understand before locking in a specific route.
Combat stances and weapon groups
Ghost of yotei keeps the stance-swapping framework from Ghost of Tsushima but adds an extra weapon layer. Each weapon group in the game has its own stance set with a different rhythm: katana stances reward patient deflection and a single decisive strike, dual swords favor aggressive combos and dodging, the odachi rewards heavy single-target damage at the cost of mobility, and the spear punishes groups of enemies who bunch up. Players who pick the wrong stance for the encounter type will find the fight technically winnable but slow. Players who match the stance to the dominant enemy type in the area will clear groups noticeably faster, and the resource rewards from bounties and duels will stack up over the course of a region.
A practical rule for the walkthrough: check the icons on the enemy’s banner or on a nearby bounty poster before engaging. Mixed groups almost always benefit from a stance with wide sweeps, while single duels are usually won fastest with a stance built around two or three precise counters followed by a heavy follow-up. The walkthrough also assumes the player is willing to swap stances mid-fight, because some late-game encounters begin as duels and then escalate into multi-enemy brawls after the first health bar is removed. A player who has only practiced one stance will run out of options precisely when the late game demands more.
Armor, charms, and dye economy
Armor in ghost of yotei is split into head, body, and a small set of accessory slots that accept charms. The head and body slots provide the largest stat changes and the most meaningful set bonuses, while charms are the practical way to fine-tune a build around a specific encounter type. The dye system, inherited from Ghost of Tsushima, lets players customize the appearance of any armor set without losing its stats, which makes it reasonable to prioritize function over fashion and change the look at any rest point. A surprising number of players burn through their early-game coins on dyes, then reach the first major duel with under-leveled armor and no charm components left to craft a counter.
The economy question is one of the most common walkthrough decisions. Early-game coins are scarce, and dyes cost a noticeable portion of the player’s reserves. A safe rule is to spend coins on armor and weapon upgrades first, then on charm crafting materials, then on dyes. Reversing that order tends to leave players visually customized but mechanically under-equipped for the next region’s bounties. The walkthrough below treats the first armor set as a checkpoint purchase, treats the first charm as a craft, and treats the first dye as a reward for finishing the second act’s first major duel.
Exploration tools and traversal
For additional context, Traversal in ghost of yotei layers several tools on top of the basic sprint and jump system. The protagonist can ride, glide with a cape, swim, and use a grappling line in specific encounters. Exploration rewards are placed along vertical features: ledges, frozen waterfalls, broken bridges, and cliffside shrines. A walkthrough should plan loops around one or two traversal tools at a time rather than trying to chain every tool in a single circuit, because the pacing of rewards is tuned around gradual mastery of each tool separately. The first traversal upgrade, the cape, is what turns a slow walk along a ridge into a fast, satisfying glide to the next fast-travel point.
One practical consequence of this design: the densest clusters of optional exploration challenges in each region are placed at the end of a loop that requires the traversal tool you just unlocked in that region’s story. Players who skip the story to chase the icons will find many of them inaccessible, and the ones that are reachable are not tuned to the player’s level. The walkthrough treats the regional story duel as the gate that opens the rest of the region, which is the same gate the developers used when placing activities on the map.
Recommended progression: act-by-act walkthrough
The route below is built to keep the player’s combat level, gear, and resources roughly aligned with the suggested level on each new region’s map. It assumes a normal difficulty run on a fresh save. Players on higher difficulties or on a focused speedrun can compress the act order, but the level and gear gates that open each new region still apply. The order below is the one that respects those gates while leaving room for the optional activities that give the open world most of its texture.
Act 1: The snow roads and the first contract
Act 1 takes the player from the opening coastal village to the first large settlement that serves as a regional hub. The first few hours teach the core combat verbs and introduce the first two stance types. Side content in this act is light, and most of it is designed to teach a specific mechanic rather than to test the player. The walkthrough priorities for this act are:
- Follow the main quest until the first stance is unlocked, and resist the temptation to detour into the higher-level inland area before the quest gate opens.
- Clear the surrounding road activities, because they teach stealth and detection mechanics that reappear later under more punishing conditions.
- Visit the first merchant and buy one armor dye slot, then leave the rest of the coins for later. One slot is enough to learn the system without spending the armor upgrade budget.
- Save the first legendary hunt until the act’s main quest asks the player to track a target on horseback, because that hunt teaches a mechanic the player would otherwise have to relearn in the next region.
- End the act at the first fast-travel point so the next loop can start at the closest hub to the new region’s gate.
Act 2: The inland forests and the first major duel
Act 2 moves inland and introduces the second weapon group. The regional combat level rises sharply, and the duels that act as mini-bosses become genuinely punishing if the player skipped the previous act’s side content. The walkthrough priorities for this act are:
- Upgrade the first weapon to its second tier before clearing the first major duel. The tier upgrade is the single largest damage increase available in the act, and skipping it makes the duel a coin-flip.
- Pick one accessory charm that counters the enemy’s most common attack in this act, which is a thrusting polearm strike from a group of mixed enemies. One well-chosen charm is worth more than three generic ones.
- Clear the first set of fox dens because they unlock a fast-travel network that becomes more valuable in the next act. Each den is short, and the total investment is around thirty minutes for a permanent convenience.
- Begin a parallel loop of bounty boards in the current region, because the bounties are placed on roads the player is already traveling. This is the act where the open-world loop pattern from the section below starts to pay off.
- End the act with a full set of regional armor, because the next act assumes the player has the second armor set equipped and not the starter chest piece.
Act 3: The highlands and the mid-game gear check
Act 3 is the largest open-world section in ghost of yotei, and it is where the walkthrough decisions get harder. The highlands contain the densest cluster of optional content in the game, and the player’s mechanical skill usually catches up to the recommended level by the end of this act. The priorities are:
- Clear the major story duel in this act before fanning out into side content, because the reward unlocks a traversal tool that opens the highest-value optional activities.
- Use the new traversal tool to clear vertical exploration challenges, which yield the largest single deposits of upgrade materials in the entire game. These deposits are the only realistic way to fund the second weapon tree before the late game.
- Run a focused bounty loop on the way to each new fast-travel point so the player is rarely more than one detour from the next objective. The bounty loop also gives the player the charm components needed for the late-game build.
- Decide before the end of this act whether to invest in the late-game weapon tree or in the late-game armor set, because both pull from the same resource pool and most players cannot afford both at the same time. The walkthrough recommends the second weapon tree, because the late-game enemies are tuned around having ranged or area options available.
- Save one slot in the charm loadout for an endgame charm token, because the second weapon tree is most effective when paired with one build-defining charm rather than three situational ones.
Act 4: Late-game routes and the final duels
Act 4 brings the player back to Mount Yotei itself and unlocks the final traversal and combat options. The story beats are fewer and farther between, but the optional content that remains is the hardest in the game. The walkthrough priorities for this act are:
- Finish the second weapon tree before the final duels, because the late-game enemies are tuned around having the second weapon’s ranged or area options available. A player who reaches the final duel with a single weapon tree will spend more attempts than a player who has both.
- Save the highest-tier legendary hunts for after the story, because they reward cosmetics and endgame charms that are designed to extend the life of a finished save rather than to gate progression.
- Complete the remaining map completion challenges last, because the traversal upgrades from the previous act reduce the time cost of chasing them dramatically. What would be a forty-minute climb in act 3 becomes a five-minute glide in act 4.
- End the playthrough on a deliberate choice: completion run, build run, or exploration run. The endgame section below covers how each of these choices plays out on a finished save.
Combat tactics that hold up across every act
A walkthrough is only as useful as its combat advice, and ghost of yotei’s combat rewards a small number of reliable habits more than a large playbook of tricks. The patterns below work from the first real fight to the final duel, and they are the patterns the rest of the walkthrough assumes the player is comfortable with. None of them are exotic, and that is the point: the game is built around habits, not hero plays.
Deflection first, dodge second, parry third
Deflection, the timed block that costs little stamina, is the safest base layer in every encounter. Dodging is best reserved for attacks with a long wind-up that deflection does not cover, which is usually the heavy unblockable strikes at the end of a combo. Parries, the higher-risk counter that punishes a single enemy heavily, are best saved for duels where the player has already seen the enemy’s pattern. A ghost of yotei walkthrough that suggests otherwise usually assumes a higher player skill level than a first-time player is likely to have, and that gap is the single most common reason a player gets stuck on an early duel.
The walkthrough assumes a deflection-first style for two reasons. First, deflection is forgiving on timing, and a player who learns to deflect consistently can clear the entire game without ever using the more advanced parry windows. Second, deflection leaves more stamina for the follow-up attack, which is where the damage in this game is actually done. The stance choice matters less than the deflection habit, and a player who has the habit will outperform a player with a better stance and a worse read on incoming attacks.
Use terrain before you use stances
Pulling a group of enemies into a narrow bridge or a snowbank is more efficient than switching to an area stance, and the game’s detection system encourages luring instead of charging. The walkthrough assumes the player is willing to spend a few seconds positioning before each fight, which pays off massively during bounties and duels. A group of four enemies funneled into a single-file bridge is a different fight from a group of four enemies in an open field, and the player who takes the time to create the funnel will end the fight with more health and more resources than the player who tries to brute-force the encounter.
Save high-cost abilities for elites and duels
Several abilities cost a non-trivial resource. Burning them on standard enemies is rarely worth it, and the player’s pool only refills at rest points or during specific in-combat moments. Reserve these abilities for enemies with a yellow health bar, and never open a duel with one. The opening exchange of a duel is the most punishing moment in the fight, and the player who spends a high-cost ability there is the player who loses the duel. The walkthrough’s resource table below assumes the player is using these abilities at the same rate the game rewards them, which is roughly one per elite and two per duel.
Exploration checklist by region
The table below summarizes the most useful open-world content per region and the player state required to clear it comfortably. The combat level column is a soft recommendation, not a hard gate, and assumes a normal difficulty run on a fresh save. The walkthrough assumes the player completes each region in the order shown, and the table is the reference a player returns to when planning a loop around a specific fast-travel point.
| Region | Recommended combat level | Best entry activity | Why it matters for the walkthrough |
|---|---|---|---|
| Southern coast | 1 | First road patrol | Teaches stealth and detection mechanics |
| First major settlement | 3 | Merchant upgrade path | Unlocks dye system and first charm slot |
| Inland forest | 6 | First major duel | Sets difficulty curve for the rest of the game |
| Highland plateau | 10 | Vertical shrine challenges | Source of large upgrade material deposits |
| Mount Yotei foothills | 14 | Late-game bounty loop | Tests all combat and traversal tools together |
| Mount Yotei summit approach | 18 | Final story duels | Requires the second weapon tree |
Bounty, duel, and hunt priorities
Ghost of yotei hides its most rewarding content behind bounties, duels, and legendary hunts. A walkthrough that ignores them misses the best armor and the most interesting fights. The priority order below respects the level gates of each region while keeping travel costs low. It assumes the player is doing these activities in the same session as the surrounding main quest, not as a separate endgame chore, and the order is the same one the resource table is built around.
- Regional bounties: do these first, because they award the charms that make the next region’s enemies easier. Bounties are also the most consistent source of armor thread in the early game.
- Road duels: do these in transit between story beats, because the encounter is usually on the path the player is already walking. Each duel awards a meaningful chunk of combat experience and a unique charm that does not drop elsewhere.
- Legendary hunts: do these after the main story of the current region is complete, because the rewards are tuned for that region’s level and the fights are unfair below it. The hunts are also the only source of the cosmetic sets that reward the longest tail of the game.
- Vertical shrine challenges: do these last within a region, because they assume the player has the traversal tool from the same region’s story progression. The challenges yield the largest single deposits of upgrade materials, and they are the most efficient way to fund the second weapon tree in act 3.
Resource and upgrade priorities
The walkthrough is simpler when the player is rarely forced to grind for one specific material. The table below lists the resources that most often bottleneck a normal-difficulty run, the act where they become important, and the activity that provides the most reliable source. The suggested spend column is the line item the walkthrough assumes the player is funding first, and the order of the rows is roughly the order in which the resources become a problem if the player ignores them.
| Resource | Becomes important in | Most reliable source | Suggested spend |
|---|---|---|---|
| Weapon upgrade material (common) | Act 1 | Road patrols and duels | First weapon tree |
| Armor thread | Act 2 | Bounties | Head and body slots |
| Charm components | Act 2 | Merchant crafting and hunts | One encounter-specific charm |
| Weapon upgrade material (rare) | Act 3 | Vertical shrine challenges | Second weapon tree |
| Dye components | Act 3 | Merchant and side quests | One full set per region |
| Endgame charm tokens | Act 4 | Legendary hunts | Save for one or two builds |
Common walkthrough mistakes to avoid
Players following a ghost of yotei walkthrough tend to repeat the same handful of avoidable mistakes. Spotting them early saves hours of replaying the same fight, and most of them are obvious in hindsight, which is why they are worth listing in their own section rather than burying them in the act-by-act breakdown. None of these are bugs, and none of them are secrets; they are the predictable outcome of a player who has not yet learned how the open world paces its rewards.
- Skipping the first region’s fox dens. The fast-travel network they unlock is mandatory for an efficient walkthrough, and the time cost of building it late is significant. A player who returns to build the network in act 3 will spend more time on the road than in fights.
- Spending coins on dyes before upgrading armor. The visual payoff is real, but a player who cannot survive a bounty is not going to enjoy showing off a dye they earned by accident. The walkthrough treats dyes as a reward, not a priority.
- Chasing every activity marker in a new region before the story unlocks the local traversal tool. The challenges are usually inaccessible, and the ones that are accessible are not tuned to the player’s level yet. The marker density is a hint, not an order.
- Ignoring the duels. Duels reward the largest single chunks of combat experience in each region and unlock charms that make the next region easier. A player who skips duels in act 2 will hit a wall in act 3, and the wall is almost always a charm gap.
- Hoarding rare weapon upgrade material until late in the game. Late-game enemies assume the player has the second weapon tree, and a player who has not invested in it will be forced to grind it under pressure. The walkthrough treats the rare material as a budget item, not a savings account.
- Saving the game only at fast-travel points. The autosave system is reliable, but a manual save at the start of each act is cheap insurance against a lost run, especially on higher difficulties.
How to plan an efficient open-world loop
The fastest way to clear ghost of yotei’s open world is to run small loops rather than long sweeping routes. The walkthrough pattern that consistently saves the most time looks like this, and it is the same pattern the act-by-act breakdown above is built around. The pattern is not specific to a single region, which is why it is worth describing in its own section: a player who has internalized the loop can apply it anywhere on the map.
- Start at the current fast-travel point and check the two closest bounty markers on the map.
- Pick the closest two bounties, one duel, and one shrine challenge as the loop’s targets.
- Clear them in an order that ends near the next fast-travel point on the route to the next story beat.
- Rest, refit charms, and continue the story. The rest is the moment the walkthrough assumes the player is using to plan the next loop.
This pattern keeps travel time low, ensures the player never runs out of charm components, and avoids the open-world fatigue that comes from trying to clear an entire region in a single sweep. It also makes the walkthrough readable, because each loop has a clear objective, a clear list of activities, and a clear destination. A player who follows the loop in act 2 will already have the habit by the time act 3’s larger open world opens up, and that habit is the difference between an efficient playthrough and a forty-hour detour.
Endgame and what to do after the main story
Ghost of yotei is a single-player game without a live-service loop, so the endgame is a deliberate choice rather than a forced grind. After the final duel, the walkthrough splits into three reasonable options depending on the player’s goal. The options below are the same ones most players end up choosing, and the choice tends to reflect what the player enjoyed most about the campaign rather than which rewards are numerically best.
- Completion run: chase the highest-tier legendary hunts, the remaining map icons, and the cosmetic sets locked behind them. This is the most time-consuming option and usually doubles the runtime of a normal playthrough.
- Build run: pick one weapon tree, one armor set, and one charm loadout, and use the remaining hunts and bounties to perfect that build. This is the most satisfying option for players who enjoy combat depth, and it is the option that benefits most from the resource table above.
- Exploration run: ignore combat, follow the remaining vertical exploration challenges, and finish the map’s hidden points of interest. This is the most relaxing option and the one most players regret not taking on a second save.
Players who intend to start a New Game Plus run should save the highest-tier legendary hunts for the playthrough they want to keep, because some rewards scale with the playthrough level in ways that a first save cannot easily replicate. The walkthrough does not require a New Game Plus run to see the game’s best content, but a second playthrough is a reasonable way to experience the parts of the open world the first save left untouched, especially the late-game legendary hunts and the cosmetic sets locked behind them.
Frequently asked questions
How long is the ghost of yotei main story?
A focused playthrough of the main story on normal difficulty takes roughly 25 to 35 hours, depending on how many duels and bounties the player clears along the route. A completion run that includes all optional content typically lands in the 50 to 70 hour range, and a build-focused run that skips most of the cosmetic content lands closer to 40 hours.
Is there a recommended level for the first major duel?
The first major duel recommends a combat level of six, which the player reaches naturally during the second act’s main quest if they have been clearing the surrounding road patrols. Skipping the patrols makes the duel noticeably harder, but it is still possible with patient deflection and one or two attempts. The walkthrough treats the patrols as part of the duel’s prerequisites rather than as optional content.
Should the player buy armor dyes early?
The dye system is a cosmetic layer that does not affect stats, and the early-game coins are better spent on the first weapon upgrade and a single charm. Most walkthroughs recommend waiting until the second act’s first major merchant before spending meaningful coins on dyes, by which point the player has a clearer sense of which armor set they want to customize. The first dye slot, by contrast, is a small enough purchase that the walkthrough treats it as a checkpoint reward.
What is the best early-game weapon?
Each weapon group in ghost of yotei has a different rhythm, and the best early-game weapon is the one whose rhythm matches the player’s existing habits. Players who favor parry-driven combat usually prefer the katana, players who like to keep moving lean toward the dual swords, and players who prefer a single decisive blow take to the odachi. The walkthrough does not require a specific choice, and the game lets the player keep multiple weapons equipped for exactly this reason.
Are legendary hunts missable?
No. Legendary hunts remain in the world after their introductory region is complete, so a player who skips one can return later. The recommended walkthrough order completes each hunt in its home region because the rewards are tuned for that region’s level, but the player will not permanently miss any content by delaying a hunt. Some hunts do scale with the player’s combat level, which is another reason to leave them until after the relevant region’s story is complete.
Does the game autosave often enough for casual play?
Yes. The autosave system triggers at the start of every main quest, at the end of every duel, and at every fast-travel point. Players who want a manual safety net can also save at any rest point, which is the same place the player refits charms and dyes. The walkthrough assumes the player is saving at the start of each act, which is a cheap habit that costs almost nothing in play time.
Is there a point of no return in the story?
The final act includes a brief stretch where the player cannot return to the open world, but it is short and clearly signposted. The game returns the player to the most recent fast-travel point after the final duel, and the open world remains fully accessible for any post-story activity the player wants to complete. There is no permanent missable content in the final stretch, which is one of the design choices the walkthrough relies on when it recommends saving the highest-tier legendary hunts for after the story.
What is the most efficient way to farm upgrade materials?
The most reliable source of upgrade materials is the loop of road patrols and duels along the player’s current story path, because they respawn at the rate the player traverses the map. Standing in one area to farm is not necessary and is much slower than the simple act of playing the game in the recommended order. The resource table above is built around this assumption, which is why the table does not include a separate “farming” row.
Should the player clear side content before or after the main story?
The walkthrough mixes side content into the main story path because the rewards are tuned for the player’s current region. A pure main-story run is possible, but the player will reach late-game content with weaker gear and fewer charms than a player who followed the recommended mix. A pure side-content run before the story is also possible, but it is inefficient because many late-game challenges are not yet accessible.
What is the single best ghost of yotei walkthrough tip for a first-time player?
Deflect more than you parry, rest between every loop, and let the map’s recommended combat level set the pace. The game is built around a slow build of mastery rather than a single breakthrough moment, and the players who enjoy it most are the ones who let the walkthrough do the planning so they can focus on the combat and the world. The map’s recommended level is the single most reliable guide the game gives the player, and ignoring it is the single most common reason a first playthrough runs longer than it should.
Leave a Reply