
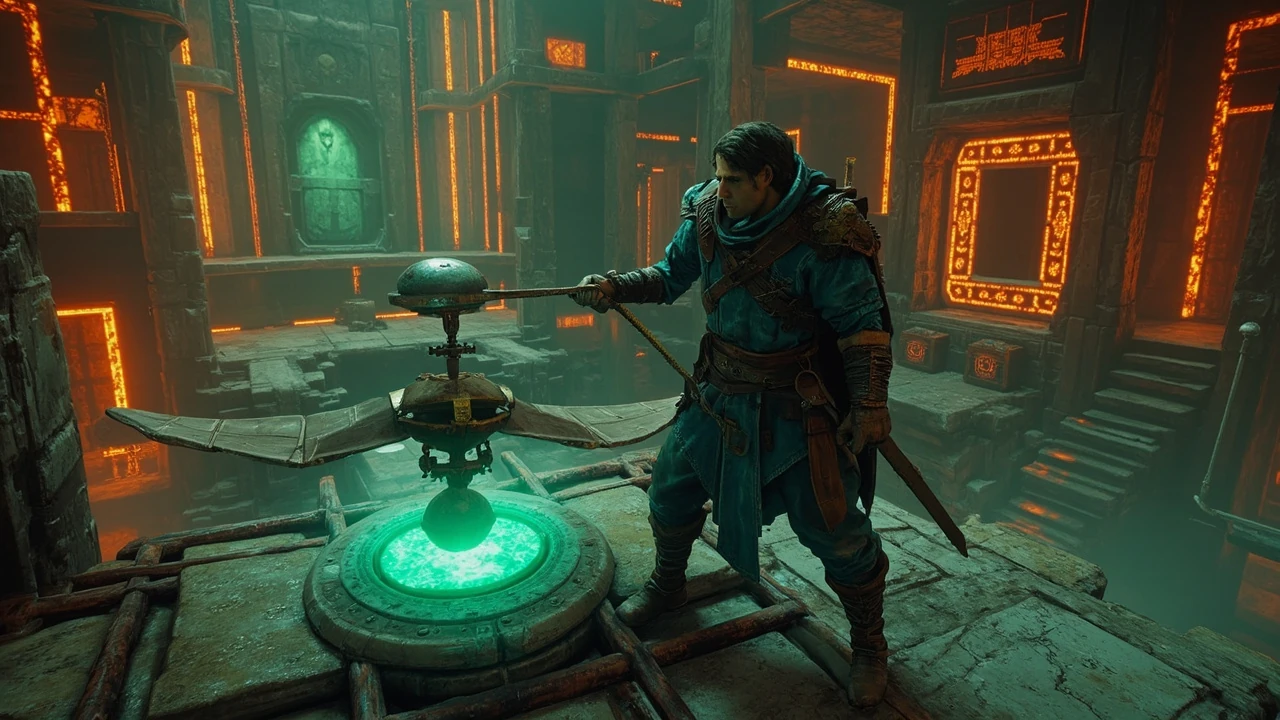
Orochium Shrine in Tears of the Kingdom: how the puzzle actually works
The orochium shrine sits in plain sight just north of Snowfield Stable in the Hebra Mountains region of Hyrule, and on a first visit it looks almost too simple. A small stone ball and a final gate are visible from the entrance, and the natural assumption is that carrying the ball forward is the entire puzzle. That assumption is wrong. The orochium shrine is a loop puzzle, one of several in Tears of the Kingdom that sends the player deep into a side chamber only to bring the same object all the way back to the room where it started, and the design teaches the value of the Ultrahand ability in a more controlled environment than the open world.
This guide walks through the orochium shrine step by step, explains the routing decisions a developer or designer can take away from the room, and highlights the small mechanical details that make the encounter either feel smooth or frustrating. Everything below is grounded in the verified walkthrough for the shrine, so the order of rooms, the enemy encounters, the chest contents, and the puzzle constraints are accurate to the released game rather than reconstructed from memory.
Where the orochium shrine is and what to bring
Before planning the route inside the shrine, it helps to know what you are walking into. The orochium shrine is one of 152 shrines in The Legend of Zelda: Tears of the Kingdom, which means the puzzle is self-contained, has no time limit, and uses only the abilities you already have at that point in the campaign.
- Region: Hebra Mountains, in the northwest of the map.
- Surface landmark: directly north of Snowfield Stable, visible without any climbing tricks.
- Shrine quest title: Courage to Fall, which describes the trapdoor mechanic rather than a moral lesson.
- Combat loadout: cold resistance is recommended for the overworld approach because the Hebra region drops below freezing at night.
- Inventory: a few extra arrows are useful but not required because the shrine gives you a small cache as a reward.
- Abilities assumed: Ultrahand for moving objects, Ascend for vertical shortcuts, and crouch movement for tight spaces.
Because the shrine has no hidden prerequisite, the only real preparation is the standard Hebra travel kit. Weapons, food, warm clothing, and one spare bow for the optional chest arrows will see you through. The puzzle inside the orochium shrine never asks for a bomb, a flame weapon, or a Zonai device that is not already in the room, so the player does not need to grind materials in advance.
Shrine layout at a glance
The orochium shrine is small enough that an internal map is more useful than a long description. The table below summarises the rooms a player walks through, the primary action in each, and the reward or exit that follows.
| Room | Primary mechanic | Key action | Reward or exit |
|---|---|---|---|
| Entrance hall | Ball and final gate visible; trapdoor warning | Use Ultrahand on the stone double doors straight ahead | Access to the laser grid corridor |
| Lower corridor | Impassable laser grid, one construct enemy | Go left around the corner, defeat the enemy, then Ascend to the upper level | Ladder and crouch opening to the next room |
| Upper landing | Second construct, treasure chest, second laser grid | Use a falling attack from the upper level, then cross the edge of the platform to bypass the grid | Chest containing 5 arrows; green locked door ahead |
| Laser hallway | Timed horizontal lasers | Stick to the side, run under when the lasers rise, then Ascend at the far end | Chest containing the Small Key |
| Key room | Ball pickup and moving platform | Open the green door with the Small Key, take the ball, step onto a blue platform | Ball placed in hole, gate lowers, glider acquired |
| Return trip | Combined ball and glider on rails | Attach ball to glider with Ultrahand, place on rails, hit the fans, ride back | Ball placed in entrance hole, final gate opens, shrine complete |
Reading the layout as a loop rather than a corridor changes how you approach the puzzle. The orochium shrine is not interested in teaching you how to reach the end; it is interested in teaching you how to undo the path that the level designer chose for you.
Step-by-step walkthrough of the orochium shrine
Each step below is written so that a player who has never entered the shrine can follow along without needing to scrub back through a video. The wording is intentionally close to in-game prompts because the shrine relies on a small set of verbs that the controller maps to specific buttons.
- Enter the shrine and face the stone double doors. Use Ultrahand to grab both panels and slide them apart. The hole that needs the ball is on the left, and the final gate is on the right.
- Ignore the laser grid straight ahead. Touching the lasers opens a trapdoor in the floor, and falling through it sends you back toward the entrance before you have the tools to solve the puzzle.
- Turn left at the corner and engage the first construct. Defeat it with a melee weapon or a couple of arrows, then walk to the end of the short path and use Ascend to rise to the upper level.
- Climb the ladder and crouch through the small opening. Stop at the top and look down to confirm the position of the second construct, then drop onto it for a falling attack.
- After the second construct is destroyed, open the treasure chest on the right of the double doors for five arrows. Use Ultrahand to open the second set of stone double doors and continue.
- The second laser grid in this room is avoidable. Cross along the edge of the platform, letting the floor panels open under you without stepping on them, and reach the green door without falling.
- Defeat the two constructs that descend when you approach the green door. The door requires a Small Key that you do not have yet.
- Double back across the trapdoor and drop through it deliberately. You will land in a hallway with another laser grid running across it.
- Stay to the side of the hallway and watch the horizontal lasers. When they rise high enough, run under them and continue to the far wall. Use Ascend there to reach a small ledge with the Small Key chest.
- Cross the laser hallway a second time and Ascend at the opposite end. You will emerge directly in front of the green door.
- Open the green door with the Small Key and pick up the stone ball inside. Carry it across the room and step onto one of the moving blue platforms on the left or right.
- Ride the platform up to a higher floor with a hole in it. Place the ball into the hole. The lowered gate gives you access to a glider device on a short rail.
- Pick the ball up again with Ultrahand and attach it to the glider. Place the combined contraption on the rails that lead off the platform toward the entrance.
- Step onto the glider, hit the fans to push yourself forward, and ride the rails back to the entrance hall. The rails carry you and the ball over the trapdoor and back to the start.
- Step off the glider, take the ball, and place it into the hole on the left of the entrance. The final gate opens, the shrine completes, and Link receives a Light of Blessing.
That sequence is the entire orochium shrine. There are no optional bosses, no hidden exits, and no secret chests beyond the arrow cache and the Small Key chest, which are both required to finish the puzzle.
What the orochium shrine teaches about Tears of the Kingdom design
From a game design perspective, the orochium shrine is a compact case study in how Tears of the Kingdom uses a single room to teach several ideas at once. The room is laid out so that the most obvious path is the wrong one, the safe path is a side path, and the correct path requires the player to combine two abilities that they have used separately up to this point in the adventure.
The trapdoor at the entrance is a soft tutorial device. Touching the lasers feels like a reasonable shortcut, and the trapdoor punishes the action with a long fall rather than instant failure. The designer is signalling that the laser grid is a real obstacle, not a cosmetic effect, and that the only safe response is to avoid it. The shrine then rewards the cautious choice by placing an arrow chest on the longer route, which reinforces the idea that patience is mechanically supported.
The ball and glider combination is the second teaching moment. Ultrahand has been used in earlier shrines to move single objects, and the orochium shrine is the first place in the Hebra region where the player must attach one object to another, place the combined device on a fixed rail, and ride it. That sequence is the minimum viable version of the vehicle building that defines the open world, and it works because the rails constrain the failure space. The ball cannot fall off the track, the glider cannot be aimed in the wrong direction, and the fans have a fixed direction, which means the player only has to make one correct decision: that the ball and glider should be combined.
For developers, the relevant pattern is the use of a closed level to teach a system that later appears in the open world with far more parameters. The orochium shrine is essentially a unit test for the Ultrahand attachment system, and the test passes when the player reaches the end without understanding that they have just been tested.
Enemy encounters and how to clear them safely
The For additional context, shrine has three small construct encounters, and each one is placed in a position that makes the room harder if the player ignores the environment. The first construct guards the path to the Ascend shortcut, the second construct is positioned under the upper level so that a falling attack is the intended answer, and the two constructs in the key room are arranged to fall from above when the player approaches the green door.
- First construct: fought in a tight corridor where a one-handed weapon and a shield parry are safer than a bow because the room is small.
- Second construct: best handled with a falling attack from the upper level rather than a direct drop, because the construct will face away from the ladder if you wait one extra second.
- Key room constructs: spawn from platforms on either side of the green door and can be staggered by retreating into the doorway. A single perfect parry followed by a flurry rush finishes both with the same weapon.
None of the enemies in the orochium shrine are lethal on their own, but the trapdoor in the entrance hall and the laser hallway make a death far more punishing than it looks. If you die inside the laser hallway, you respawn at the last shrine you touched, which is often the orochium shrine itself, but the laser pattern resets and the platforming has to be redone. The safe answer is to treat the constructs as a brief pause rather than a duel.
Chests, rewards, and what the orochium shrine actually gives you
The orochium shrine has two chests and one shrine completion reward. The chest contents are small but useful, and the completion reward is the same Light of Blessing that every shrine grants. The table below lists the rewards a player can expect, with the assumptions used in the verified walkthrough.
| Reward | Source | Use | Notes |
|---|---|---|---|
| 5 arrows | Treasure chest in the upper landing | Ranged combat or construct strafing | Small enough to ignore, useful in early game |
| Small Key | Chest reached by crossing the laser hallway and using Ascend | Unlocks the green door and the rest of the puzzle | Required for completion, not optional |
| Light of Blessing | Granted automatically on completion | Increases heart container or stamina wheel | Standard shrine reward across Tears of the Kingdom |
If you have already exhausted both chest rewards, the only remaining reason to re-enter the orochium shrine is to re-read the puzzle for practice, to test a different Ultrahand attachment, or to use the shrine as a fast travel node while exploring the Hebra region.
Common mistakes that turn the puzzle into a fight
Even though the orochium shrine is short, a few recurring mistakes will slow a first run. Most of them are caused by reading the room as a corridor rather than a loop, and they are easy to correct once the layout is clear.
- Touching the first laser grid: the trapdoor resets the puzzle and sends Link back toward the entrance, often with a damaged heart.
- Running through the second laser grid instead of along the edge: the floor panels open under Link and the fall is long enough to cost a heart on its own.
- Forgetting to pick the ball back up after placing it in the upper hole: the lowered gate gives access to the glider, but the shrine does not finish until the same ball is delivered to the entrance.
- Skipping the construct before Ascend: the construct on the lower level will hit Link while he is rising through the ceiling, and the Ascend animation locks movement for a few seconds.
- Rushing the laser hallway: the horizontal lasers rise and fall on a fixed cycle, and a mistimed run will knock Link into the trapdoor below.
Each of these has the same underlying cause. The player assumes forward progress is rewarded and is surprised when the level designer has chosen to make the start of the room the goal of the puzzle. The fix is to look for the hole that needs the ball as soon as you enter and to plan the route so that the ball travels from the back of the shrine to the front, rather than the other way around.
How the orochium shrine fits into Hebra exploration
The Hebra region is one of the coldest areas in Tears of the Kingdom, and Snowfield Stable is a popular resupply point for players who are chasing shrines along the northwestern ridge. The orochium shrine is one of the more convenient stops on a Hebra loop because it sits on the surface and does not require a long climb. Players who are working through the shrine counter toward the map completion percentage will often pair the orochium shrine with the other Hebra shrines to the north and west, then return to the stable to cook a warm meal before heading into the next one.
For developers, the placement of the orochium shrine is also a small lesson in level pacing. The shrine is visible from the stable, which lowers the friction of starting it, and the puzzle is short enough that a player who is overleveled or underequipped can clear it in a few minutes and move on. That choice keeps the Hebra region feeling generous without turning every shrine into a long dungeon.
Why the orochium shrine is a good first Ultrahand attachment puzzle
Earlier shrines in Tears of the Kingdom teach Ultrahand as a single object mover, and the open world encourages players to attach sticks, rocks, and fans to wooden planks almost as soon as they leave the Great Sky Island. The orochium shrine sits between those two phases. The room is small enough that the player is not asked to manage an inventory of parts, but the attachment is mandatory, which means the shrine validates a single core idea before the open world throws multiple parts at the player at once.
The design lesson is that constrained puzzles are useful right before the system is opened up. If the player learns to attach a ball to a glider in a room with rails and a single direction, they will trust the same attachment in a minecart, a hover bike, or a flying machine in the open world. The orochium shrine is the minimum example of that pattern, and the wider game expands the same idea into the much more complex contraptions that define the late game.
Troubleshooting the orochium shrine when the puzzle stalls
If a run through the orochium shrine is not progressing, the most useful diagnostic is to check whether the ball is at the entrance. The shrine does not progress without the ball in the entrance hole, and the most common reason for a stalled run is that the player placed the ball in the upper hole and then tried to leave the room without picking it back up. A quick reset is to ride the moving platform back up, take the ball, attach it to the glider, and ride the rails to the entrance.
Another stall point is the laser hallway. The horizontal lasers move on a fixed cycle, and a player who tries to time the run without watching for at least one full cycle will often misread the timing. The safe pattern is to stand at the entrance of the hallway, count one full rise and fall, and then run during the high point. If the run fails, the trapdoor sends the player back to the entrance, which is annoying but not destructive, and the chest containing the Small Key is still reachable from the same Ascend shortcut.
For players who are using motion controls, the glider section can feel imprecise. The shrine does not require precision aiming because the rails are fixed, but the fans on the platform are easier to hit with a single swing of a melee weapon than with an arrow, and the rails will carry the contraption forward regardless of the camera angle. If the ball falls off the glider before the rails start, the easiest fix is to reattach the ball while standing on the platform and to step onto the glider from the same side as the rails.
Frequently asked questions
Where is the orochium shrine in Tears of the Kingdom?
The orochium shrine is located in the Hebra Mountains region, directly north of Snowfield Stable. It is visible on the surface without any climbing, which makes it one of the more accessible shrines in the northwest of the map.
What is the official name of the orochium shrine quest?
The orochium shrine’s quest is called Courage to Fall, which is a reference to the trapdoor in the entrance hall rather than to any narrative content outside the shrine.
Do I need cold resistance to reach the orochium shrine?
Cold resistance is recommended for the approach because Snowfield Stable sits in a region that drops below freezing at night, but the shrine itself is indoors and does not expose Link to the weather. A warm meal or a piece of cold resistance armor is enough to handle the overworld walk.
How many chests are inside the orochium shrine?
There are two chests in the orochium shrine. The first contains five arrows, and the second contains the Small Key needed to open the green door near the end of the puzzle. Both chests are required to complete the shrine because the Small Key is on the only path to the ball.
Can I skip the constructs in the orochium shrine?
The first two constructs can technically be bypassed with careful movement, but the two constructs in the key room are positioned to fall onto the player when the green door is approached. The safe approach is to clear each construct before moving on, because dying to a construct inside the laser hallway sends Link back to the entrance and resets the puzzle progress.
What is the orochium shrine ball used for?
The stone ball is the core object of the orochium shrine puzzle. It must be carried from the back of the shrine to the entrance and placed in a hole on the left of the room. The orochium shrine walkthrough on IGN describes the loop in detail and confirms that the final gate only opens once the ball is in the entrance hole.
Does the orochium shrine teach Ultrahand attachments?
Yes, the orochium shrine is one of the first shrines in Tears of the Kingdom that requires the player to attach one object to another with Ultrahand. The combination of the ball and the glider, placed on a fixed rail, is the simplest example of the attachment system and prepares the player for the more complex vehicle building that defines the open world.
What reward do I get for completing the orochium shrine?
Completing the orochium shrine grants a Light of Blessing, which can be exchanged for either an additional heart container or an extra segment of the stamina wheel. The chest rewards are five arrows and a Small Key, both of which are used inside the shrine itself.
Is the orochium shrine worth revisiting after completion?
After completion, the orochium shrine is most useful as a fast travel node while exploring the Hebra region. The puzzle itself is linear, and the only reason to re-enter is to test Ultrahand attachments or to practice the laser hallway timing before tackling a similar shrine elsewhere on the map.
Which ability is the most important inside the orochium shrine?
Ultrahand is the most important ability inside the orochium shrine because it is used to open the stone doors, to move the ball, and to attach the ball to the glider. Ascend is the second most important ability because it is the only safe way to reach the upper landing and the Small Key chest without falling through the trapdoor.
Leave a Reply