
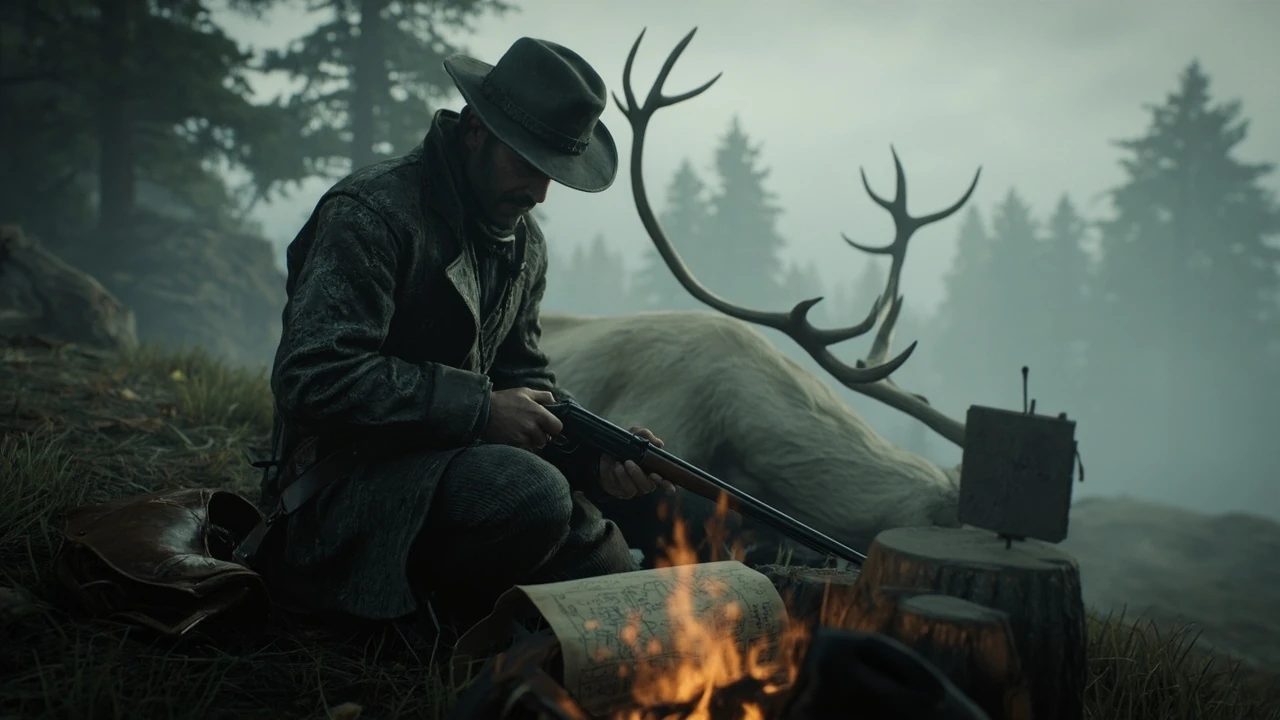
Red Dead Redemption 2 legendary animals: how the hunting system actually works
Every legendary animal in Red Dead Redemption 2 sits inside a deliberate progression loop that the game rarely explains in one place. Players unlock hunting on the first stranger mission with Hosea Matthews, then graduate from basic pelts to a parallel economy built around a single trader in the Grizzlies. The legendary tier is a small, hand-built set of creatures that behave differently from normal wildlife, drop unique crafting materials, and gate access to a complete outfit. Hunting them well means understanding three separate things: how to reveal them on the map, how to bring them down cleanly, and how to convert the carcass into usable gear.
Red Dead Redemption 2 legendary animals are the apex content of the in-game hunting pass. There are sixteen of them, scattered across every biome from the swamps of Bayou Nwa to the snowy peaks of Ambarino. Each one only spawns after a prerequisite mission or a specific story beat, and each one resists conventional tactics. The reward for completing the set is the Legendary Buck Antler Knife and the prerequisite materials for the Legend of the East satchel, which removes one of the inventory headaches that defined the first dozen hours of the game.
This guide treats legendary hunting as a single production-style task. The reader is treated as a player with a saved file at Chapter 2 or later, looking for a practical workflow that avoids wasted ammunition, ruined pelts, and missed spawn windows. The advice focuses on mechanics, region, and trade-offs, the same way a production lead would scope a multi-step side activity. Where a strategy depends on a specific quest trigger, that trigger is named so the reader can verify it in their own journal before committing time.
Before you start hunting: prerequisites and inventory basics
Legendary hunting assumes the player can already hold a large number of items, study animals for full information, and survive a long ride into hostile territory. None of these are guaranteed in the early chapters, so a quick prerequisite check is worth the ten minutes it takes.
Players should be at least Chapter 2, Mission 4, “The First Shall Be Last,” or further. The basic hunting satchel from the general store in Valentine or Strawberry is a good baseline, but it will not be enough to carry legendary components without upgrades. A rifle in the Improved class, a Varmint Rifle for small game, and a bow with improved arrows form the most reliable kit. Shotguns work for large game but ruin pelt quality if the player scores a body hit.
Before the first legendary hunt, it is worth taking care of three inventory and equipment details that the game does not flag clearly.
- Buy or craft the Improved variant of the player’s preferred weapon before attempting any legendary. Standard weapons drop pelt quality to two stars and the trader rejects the material outright.
- Fill the satchel with enough food and tonics to survive at least one predator encounter, especially in the Grizzlies, Big Valley, and Tall Trees regions where wolves, cougars, and grizzlies are common.
- Unlock the fast travel campfire system by completing “A Strange Kindness” or by donating a few dollars to the gang. This makes legendaries in the far north far more practical to revisit.
Most legendary hunts are wasted by players who try to drag a perfect pelt across half the map on a single horse. A second saddle bag upgrade, bought from any general store after the camp ledger donation reaches level two, solves the carrying problem for the small legendaries like the coyote and the fox.
The weapon upgrade path is shorter than most players expect. The Lancaster Repeater, the Carbine Repeater, and the Rolling Block Rifle can all be brought to Improved status with a single visit to a gunsmith, provided the player has the materials. A cleaned rifle also benefits from regular oiling, which most players skip until the weapon jams at the worst possible moment. The Improved Bow requires a separate recipe unlocked through the “A Fisher of Men” or “The Widow” mission line, and a missed recipe means a missed three-star pelt on every small or medium legendary.
Outfit choice matters more than players credit. The Legendary Buck Antler Knife unlocks a passive skinning boost, but the regular hunting outfit, sold by the trapper, gives a small but measurable bonus to tracking quality. Combining the two turns a two-hour legendary run into a forty-minute run because the tracking overlay lasts longer and refreshes faster when the player passes near tracks, droppings, or fur tufts.
How the legendary spawn system works
Legendary animals are not random encounters. Each one has a fixed spawn region, a set of trigger conditions, and a cooldown window that prevents the same legendary from reappearing immediately after a failed attempt. Understanding the trigger rules saves hours of riding.
The first step in any legendary hunt is to obtain a map for the species. The game labels these as “Drawn Maps” and they arrive in the post after a specific event. The first map is delivered to the player’s post office or camp after “Exit Pursued by a Bruised Ego” in Chapter 2, which unlocks the Legendary Buck. The other fifteen maps are obtained from the Harriett NPC at the fence in Rhodes, from random encounters with the Legendary Animal Map vendor in specific locations, and from completing the master hunter challenges or specific stranger missions.
Once the map is read, the player must travel to the spawn region and look for the golden question mark on the map. The question mark only appears when the player is in the correct area and not currently wanted. If the mark does not appear, the most common cause is a recent death in the same region, a wagon robbery event that has despawned the spawner, or a nighttime time-of-day lock on a few species like the Legendary Wolf and the Legendary Moose. To clarify the background to Red Dead Redemption 2, the Wikipedia article offers a concise reference.
Two spawn rules explain most of the “the animal is not there” frustration in the community. First, the player cannot fast travel directly to a legendary spawner; the approach must be on horseback or on foot. Second, certain legendaries only spawn during specific weather, particularly the fog banks in Bayou Nwa and the snowstorms around Colter. If the player has cleared the spawn area once and cannot find the animal, riding two in-game days away and back usually resets the encounter.
There is a third rule that only the most attentive players internalize. Legendary animals share their spawn region with normal wildlife of the same species, and the normal variant can briefly mask the legendary’s golden aura on the minimap. Studying each candidate with the binoculars is the only reliable way to confirm the legendary icon before taking a shot. A missed confirmation usually means the player has just spooked the legendary and triggered the region cooldown.
Time of day is another quiet gatekeeper. The Legendary Coyote, the Legendary Fox, and the Legendary Boar are most reliable between late evening and the small hours of the morning, while the Legendary Elk and the Legendary Bison are easier to find in the early daylight. Players who only ride at midday will frequently return from a three-hour ride with nothing to show for it, particularly in the open biomes where the lighting hides the golden tint that the spawner leaves on the grass.
Legendary animal region map at a glance
The following table summarizes the spawn region, difficulty, and core requirements for every legendary in the base game. Difficulty reflects the recommended weapon, not the player’s skill. Region names follow the in-game map labels used by the letter system that the post office sends to the player’s camp.
| Animal | Region | Biome | Recommended weapon | Key requirement |
|---|---|---|---|---|
| Legendary Bear | Grizzlies East | Mountain forest | Rolling Block Rifle (Improved) | “Exit Pursued by a Bruised Ego” |
| Legendary Buck | Big Valley, west of Mount Hagen | Pine forest | Bow with Improved Arrow | Same as bear, opens the trader |
| Legendary Boar | Bluewater Marsh | Swamp | Repeater (Improved) | Reach Chapter 4 or later |
| Legendary Bull Gator | Bayou Nwa, south of Lagras | Deep swamp | Repeater (Improved) or Shotgun Slug | “The Gilded Cage” or later |
| Legendary Coyote | Cholla Springs, south of Armadillo | Desert scrub | Varmint Rifle (Improved) | Reach Chapter 2 and visit the fence |
| Legendary Fox | Scarlett Meadows, near the plantation | Open meadow | Varmint Rifle (Improved) | “The Joys of Civilization” or later |
| Legendary Beaver | Roanoke Ridge, west of Van Horn | River | Varmint Rifle (Improved) | Chapter 2 or later |
| Legendary Bison | Heartlands Overflow, north of Blackwater | Prairie | Rolling Block Rifle (Improved) | Reach Chapter 6 or Epilogue |
| Legendary Moose | Roanoke Ridge, northeast of Annesburg | Northern forest | Rolling Block Rifle (Improved) | Reach Chapter 6 or Epilogue |
| Legendary Wolf | Cotorra Springs, near the northern border | Snow | Repeater (Improved) | Reach Chapter 6 or Epilogue |
| Legendary Cougar | Gaptooth Ridge, north of Tumbleweed | Arid mountain | Repeater (Improved) | Reach Chapter 4 or later |
| Legendary Elk | Heartlands, near the Cattail Pond | Prairie | Bow with Improved Arrow | “The Sheep and the Goats” or later |
| Legendary Panther | Braithwaite Manor, southeast region | Bayou forest | Repeater or Bow with Improved Arrow | “The Gilded Cage” and a time skip |
| Legendary Ram | Valentine, northeast mountains | Rocky ridge | Rolling Block Rifle (Improved) | Reach Chapter 4 or later |
| Legendary Pronghorn | Rio Bravo, near the border | Desert scrub | Rolling Block Rifle (Improved) | Reach Chapter 6 or Epilogue |
| Legendary Tatanka Bison | Heartlands, north of Blackwater | Prairie | Rolling Block Rifle (Improved) | Reach Chapter 6 or Epilogue |
The table groups legendaries by their most common failure point. A player who finishes Chapter 4 can already clean up roughly ten of the sixteen with the Improved Bow and a Rolling Block Rifle. The remaining six gate themselves on story progression in Chapter 6, so players who rush the main quest have a long wait before they can complete the set.
A second table is worth keeping in mind because it captures what most guides leave out: the route between spawn points. A player planning a single day of hunting benefits more from a route plan than from a long list of weapon swaps.
| Route | Legendaries covered | Best camp or town to stage from | Approximate ride between spawns |
|---|---|---|---|
| New Austin loop | Legendary Coyote, Legendary Cougar, Legendary Pronghorn, Legendary Ram | Tumbleweed or Armadillo | Short, all within one desert triangle |
| Bayou loop | Legendary Boar, Legendary Bull Gator, Legendary Panther, Legendary Fox | Saint Denis | Medium, swamp roads are slow |
| Heartlands sweep | Legendary Elk, Legendary Bison, Legendary Tatanka Bison | Blackwater or Rhodes | Long, but flat terrain keeps it manageable |
| Northern push | Legendary Moose, Legendary Wolf, Legendary Beaver, Legendary Bear, Legendary Buck | Colter or Strawberry | Very long, only feasible after Epilogue camp |
The four routes above cover the full sixteen-legendary set. Players who plan a route before leaving camp can finish the entire set in roughly five focused sessions, which is far faster than the scattered, region-by-region approach that most players fall into by accident.
Why some legendaries are harder than others
Difficulty in legendary hunting is a function of three independent variables: weapon handling, environmental risk, and the small but punishing chance that the animal flees the spawn zone after a bad first shot. A clean headshot from fifty yards with the right weapon resolves the encounter in under five seconds. A startled legendary can run across two map regions before the player catches up, which then forces the cooldown reset and another day of waiting.
The environmental risk scales with the biome. The Legendary Bull Gator lives in deep water with alligators, and the Legendary Panther spawns in cougar territory that is shared with the regular cougar roamers. Players who use bait to draw the legendary out of cover frequently attract a predator that interferes with the kill. The cleanest approach is to set up at the spawn marker, study the animal with binoculars to confirm the legendary icon, and then take the shot from elevation whenever possible.
There is a second layer of risk that newer players miss: the legendary pelt must reach the Pearson camp trader on a horse that has not been recently bucked. If the player rides aggressively across rough terrain to avoid a respawn, the carcass can degrade and drop from three stars to two stars. Two-star legendary materials are rejected by the trader outright, which is the single most common reason that a player thinks the system is broken. The remedy is the simple but effective habit of walking the horse out of the spawn area on the road and only galloping once the pelt is far enough from hostile wildlife to be safe.
The Legendary Panther is worth calling out separately because its difficulty is not what the map suggests. The spawn region sits inside the Braithwaite Manor grounds, and the regular cougar population around the manor makes the legendary one of the most aggro-heavy encounters in the set. Players who have not pushed their Dead Eye core to level four or higher will struggle to land a clean headshot in time, and a missed first shot usually costs the entire pelt. The only reliable counter is a fully bonded horse, a stack of potent snake oil, and a pre-aimed repeater with the Improved variant already equipped.
Late-game legendaries are easier in a different way. After the gang leaves Horseshoe Overlook, the northern regions become accessible on a regular schedule, and the cold-weather legendaries stop being a multi-day expedition. Players who are still in Chapter 4 or earlier should treat the northern set as future content rather than current content, because the camp cannot stage close enough to make the daily loop practical.
Crafting rewards and the legendary outfit set
Each legendary animal yields two unique materials that feed into the trapper outfit sets. The first material is the legendary pelt, which the player takes to Pearson at camp and donates to the satchel for crafting. The second is a smaller, themed component that unlocks a specific garment at the trapper in Saint Denis, Tumbleweed, or the Riggs Station. For an independent view of rockstar clarifies red dead redemption 2’s ‘100-hour work week,’ following backlash, the verified article adds source-specific context to this discussion.
Players who want the full Legendary Hunter outfit should plan the order of their hunts by the trapper’s distance. The Tumbleweed trapper serves the desert legendaries, the Saint Denis trapper serves the swamp legendaries, and the Riggs Station trapper serves the Grizzlies legendaries. The order below is a reasonable production-style sequence for a player in Chapter 4 who wants to minimize backtracking.
- Hunt the Legendary Coyote in Cholla Springs, then ride directly to the Tumbleweed trapper to start the Coyote Ranch Cutter vest.
- Cross to the Legendary Cougar in Gaptooth Ridge and donate to the same trapper for the Legendary Cougar Flop Hat.
- Move east to the Legendary Boar in Bluewater Marsh, then north to the Legendary Bull Gator in Bayou Nwa, and combine both into the Legendary Bull Gator Half Chaps at the Saint Denis trapper.
- Travel to the Legendary Elk in the Heartlands and combine the result with the Legendary Buck to finish the central pieces of the Legendary Hunter outfit.
- Save the late-game legendaries for the Epilogue. The Legendary Moose, Legendary Wolf, and Legendary Bison only become reliably available after the final story chapter.
The reward for completing the full set is the Legendary Buck Antler Knife, which the player can only acquire by donating every legendary pelt. The knife itself does not have an obvious gameplay effect in the core systems, but it is required to unlock the final rank of the Master Hunter challenge 10, which then unlocks the Legend of the East satchel. The satchel is the practical endgame of the legendary system, and the only reason a player should chase every pelt rather than just the ones that look cool.
Side benefits are easy to miss. The trapper also sells the Legendary Buck Vest, the Legendary Bear Head, and a small set of decorative holsters that the player can mix into non-legendary outfits. None of these affect combat, but they remove the need to spend money on cosmetic alternatives at the general store, which is a quiet budget win over a full playthrough.
Common legendary hunting failures and how to fix them
Most legendary hunting sessions fail in one of four repeatable ways. Each one has a small set of fixes that can be applied without leaving the spawn area, which makes them useful to recognize mid-hunt rather than after the player has ridden home empty-handed.
The legendary will not spawn
The most frequent cause is that the player is not in the right chapter or has not completed the prerequisite mission. The second most frequent cause is that the player fast traveled to a location that the legendary considers too close. The system requires the player to approach on horseback or on foot, which means riding from the nearest road or station into the spawn region. If the golden question mark still does not appear after a clean approach, the player should leave the region, sleep two in-game days, and try again.
The pelt dropped to two stars
This happens when the player kills the legendary with the wrong weapon, scores a body shot with a shotgun, or damages the animal with an explosive. The fix is to track the legendary to its death point and re-skin the carcass, but only if the player has not yet completed the skinning animation. A two-star legendary pelt is not salvageable, and the player must wait for the full spawn cooldown to recover it.
The horse bucked the player off during skinning
Legendary animals have a “scent” radius that can agitate a low-bond horse. Before approaching, the player should calm the horse using the patting command, equip a high-bond horse, or use the temporary horse stim from the wagon camp. A horse that has been recently spooked by a predator will throw the player off mid-skin, and the pelt will not be lost in that case, but the time lost is significant when the player is in cougar or wolf territory.
The trapper will not accept the material
The fence in Rhodes, the trapper, and Pearson all use the same underlying economy. If the player arrives with the legendary pelt before the prerequisite mission, the trader will reject the donation. The fix is to verify the chapter state and the donation quest marker, which appears automatically on the map once the trader is ready to receive the material.
There is a fifth failure mode that does not get enough attention: the player donates a legendary pelt to Pearson without realizing that the donation is permanent. Pearson does not return legendary pelts, so a player who has already donated the Legendary Buck cannot go back and use the Legendary Buck Antler Knife without reloading an earlier save. The cleanest habit is to keep one legendary pelt on the horse, donate the others in batches, and only donate the final Legendary Buck pelt after the Master Hunter challenge 10 has been unlocked.
Optimization tips for late-game and replays
Players who are returning to the game in the Epilogue or starting a second playthrough can use a few speed-oriented tactics. The legendary system is balanced around exploration, so these optimizations are not cheats, but they do compress the time cost of the full set.
- Equip the Buck Antler Knife as soon as the player has the materials for the first garment. The knife has a faster skinning animation than the default knife and reduces the time that the player is exposed at the spawn point.
- Combine hunts on the same trip. The Legendary Bull Gator, Legendary Boar, and Legendary Panther are all within a short ride of Saint Denis, and the player can complete three donations in a single day without fast travel.
- Use the cinematic camera while riding between spawns. This is a small quality-of-life improvement that lets the player cover long distances on the road while the screen is not zooming for the player to interact with the world.
- Aim for two legendaries per in-game day. The legendary spawn cooldown is roughly one full day, so the player can alternate spawn regions to clear the full set within two real-time hours of focused play.
For a player who is starting a fresh save, the most useful early-game step is to clear “Exit Pursued by a Bruised Ego” as soon as the journal allows. The first legendary hunt becomes available immediately after the quest, and the rest of the system cascades from there. A player who skips early hunts to focus on story progress will be locked out of the Grizzlies legendaries because the gang moves from Horseshoe Overlook to Clemens Point, and the road to Colter is a long ride back from the later camp.
Players who have already finished the main story and want a clean second pass should set up a dedicated camp at the Riggs Station trapper. The northern camp cuts the ride to the Legendary Bear, Legendary Buck, Legendary Moose, and Legendary Wolf down to a few minutes each, which is the difference between a forty-minute run and a four-hour run. Combined with the Improved Bow and a stack of potent snake oil, this setup produces a comfortable, repeatable loop that the player can run once per session until the trapper has nothing left to offer.
One small but useful optimization is to ignore the legendary pelt donation animation on subsequent runs. After the first donation, Pearson accepts the legendary pelt instantly, which means a player can clear three or four donations in a single in-game day without leaving camp. The trapper, by contrast, still requires the player to interact with the trader and confirm the recipe, so the trapper visit is the only bottleneck on a focused farming run.
How legendary hunting ties into the larger game
Legendary hunting is one of the few side activities in Red Dead Redemption 2 that scales cleanly with the rest of the player’s progression. A Chapter 2 player who donates a single Legendary Buck pelt already has access to a small but useful outfit boost. A Chapter 6 player who donates the full sixteen pelts has the materials for a top-tier satchel and a fast skinning knife. The system rewards the same kind of slow, deliberate exploration that the rest of the game rewards, and that is part of why it has held up so well across multiple console generations and re-releases.
It also pairs well with two other side activities that share the same map region. Legendary fish use a parallel set of drawn maps and a parallel set of spawn rules, and the Master Hunter challenge chain shares the same per-rank structure as the Master Hunter challenges for non-legendary animals. A player who is working on legendary hunting is, in practice, working on the entire hunting economy, because each rank of the challenge unlocks small bonuses that feed back into the legendary loop. Skipping one activity means the other takes longer, which is the main reason most players end up completing the whole set even when they only intended to start with one or two legendaries.
There is a less obvious reason to finish the set. The Legendary Buck Antler Knife is the only skinning tool in the game with a unique visual model, and it is one of the few items that the player’s horse can carry on the saddle without triggering a cosmetic override. Players who use the knife in the Epilogue tend to keep it equipped for the rest of the playthrough because nothing else in the inventory screen has the same visual weight. That is a small reward, but it is the kind of detail that makes a long hunt feel complete rather than transactional.
Frequently asked questions
How many legendary animals are in Red Dead Redemption 2?
There are sixteen legendary animals in the base game. A handful of additional animals were added in the PC and Stadia updates, but the standard set on consoles and current-generation platforms is the sixteen listed above. The player can only donate the base set to the trapper, and the final reward is gated on donating all sixteen pelts.
Do legendary animals respawn after being killed?
No. Each legendary can be killed and skinned once per save file. If the player loses the pelt through a quality drop or a missed donation, the legendary will not return. The most reliable way to avoid this is to verify the weapon class and the donation quest before approaching the spawn. Save scumming through a manual reload of an earlier save is the only practical recovery path, and it is the approach most players use when they discover the issue too late.
What is the best weapon for legendary hunting?
For most large legendaries, the Rolling Block Rifle in the Improved class is the safest pick because it preserves three-star pelt quality on a clean headshot and has a long effective range. The Improved Bow is a close second because it is silent, which matters in regions where the legendary flees after a missed first shot. The Varmint Rifle is required only for the small legendaries like the coyote, the fox, and the beaver.
Do I need to be in a specific chapter to hunt every legendary?
Yes. Roughly half of the legendaries are gated behind Chapter 6 or the Epilogue because of the gang’s camp location and the cold-region spawns. The Legendary Bison, Legendary Moose, Legendary Wolf, Legendary Pronghorn, and Legendary Tatanka Bison are the most common late-game blockers. Players who want the complete set should plan to revisit the spawn regions after finishing the main story.
Where is the trapper and how do I unlock the legendary outfit?
The trapper is found in three locations: Saint Denis, Tumbleweed, and the Riggs Station north of Strawberry. The player must complete the first part of “Exit Pursued by a Bruised Ego” to unlock the trader at camp, then donate each legendary pelt to Pearson. The garments become available at the trapper as soon as the matching legendary material is donated.
What is the reward for completing the legendary animal set?
The main reward is the Legendary Buck Antler Knife, which the player can use as a standard skinning tool with a faster animation. The set also unlocks the Legend of the East satchel after the player completes all ten ranks of the Master Hunter challenge, which is the more practical reward for players who care about inventory management.
Can I hunt legendary animals with a friend in Red Dead Online?
Legendary animals are part of the single-player free roam event. Red Dead Online uses a different Naturalist role with a separate legendary creature set that follows its own rules, and the rewards do not carry over between modes. Players who want the full Red Dead Redemption 2 legendary animal set must complete the single-player side content, not the Online naturalist content.
Why does the legendary not appear on my map?
The map marker is a small golden question mark that only shows when the player is in the spawn region and has the corresponding drawn map. The player must read the map in the satchel or in the post office to make the marker appear, and the marker is removed permanently after the animal is killed. The same system applies to legendary fish, which are part of a different activity with its own map set.
Which legendary hunt should I do first?
The Legendary Buck is the practical starting point because it unlocks the trader at camp and only requires the Chapter 2 mission “Exit Pursued by a Bruised Ego.” The Legendary Coyote is the next easiest because it is close to the player’s early chapter base, requires only the Varmint Rifle, and feeds directly into the Tumbleweed trapper’s first cosmetic set.
Leave a Reply