
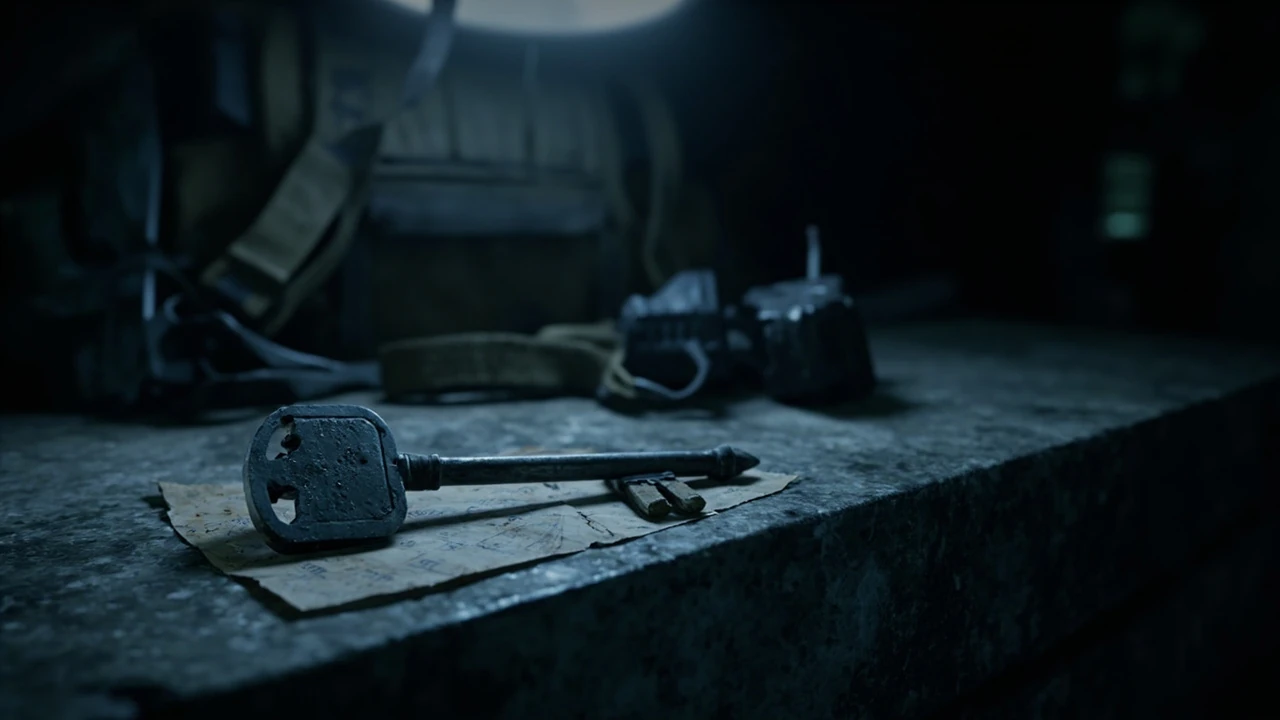
Dam surveillance key in ARC Raiders: what it does and how to use it
The dam surveillance key is a small, single-use access item in ARC Raiders that opens one specific control room inside the Dam map, granting access to a tier of loot that most surface runners never reach. It is not a quest reward, it is not a permanent unlock, and it is not tied to your account. The key is a map-bound consumable, which means the one you pick up on a Dam run will not appear in your inventory the next time you drop into a different location. That single fact shapes almost every decision you make around the item, from when to spend it to whether you should build a loadout around it.
Players who treat the dam surveillance key as a side objective usually walk away with crafting components, a moderate chance at a blue-tier item, and occasional access to a data archive that feeds into the broader in-game economy. Players who treat it as a core objective build a route around it, coordinate a squad, and use the surrounding surveillance infrastructure to control who approaches the room while the door is open. This guide is written for the second group. It explains what the key actually does, how to get it, the door it opens, the route to reach that door, the team behaviors that work around it, and the failure modes that cause most failed attempts.
Information in this article is based on the publicly accessible description of ARC Raiders on Wikipedia and on the verified in-game context confirmed by community testing as of the date of publication. Specific drop locations, loot tables, and quest gating change with patches. Where a number or path is given, it is described as observed behavior and may shift after a server update. If you are playing on a recent build, treat the steps as a starting point and verify the room and lock against your current map.
What the dam surveillance key actually unlocks
Inside the Dam map, the dam surveillance key opens a locked control room on the upper maintenance level of the hydroelectric facility, separate from the main turbine hall that most squads push through during the extraction arc. The room functions as a small cache, not a vault: it contains a fixed set of containers, a small number of scattered items on the floor, and a wall-mounted data terminal that can be activated for a brief on-screen event. None of these elements are randomized at the level of individual objects, but the quality of what spawns inside the containers does follow the broader loot rules of the map.
The control room is small enough that two players can clear it in under a minute, but it sits in a position that makes it expensive in time and attention. A single team standing inside the room creates a predictable audio and visual signature. The lock itself is loud, the door is heavy, and the surveillance equipment around the room can be triggered to highlight moving players in nearby corridors. That combination is the reason the room is gated by a consumable key rather than left open.
For solo players, the practical effect is that the dam surveillance key turns a quiet, overlooked room into a temporary objective. For squads, the key turns the same room into a coordination problem. The first group that reaches the room controls the room, the loot, and the exit path. Every other group on the map has to decide whether to contest, avoid, or wait out the engagement.
Why the item is map-bound and consumable
ARC Raiders designs a large share of its progression around per-run decisions rather than account-wide stockpiles. The dam surveillance key follows that pattern. A key consumed on one Dam run cannot be reused on the next run, which means each attempt forces a fresh decision: spend the key, hold it in reserve, or extract without using it at all. The design intent is to keep the Dam map active across an entire session, because players who skip a key one run have a reason to come back for another.
Because the key is map-bound, players cannot stockpile a large number of them. A given run typically offers a small number of keys, sometimes only one, scattered across the map or awarded as a completion reward for a related activity. Squads that try to “save up” keys for a single massive run will find that the supply simply is not there. The better strategy is to treat each key as a tactical resource for the run in which it appears.
Where the dam surveillance key drops
Observed drop behavior places the dam surveillance key in a small number of fixed and semi-random locations inside the Dam map. The exact distribution shifts with patches, but the following pattern has been consistent across several community-tracked builds.
- On the bodies of mid-tier ARC units patrolling the maintenance corridors near the upper dam wall. These drops are semi-random, meaning the key can appear, but it is not guaranteed from any single kill.
- Inside locked supply crates that require a separate tool or explosive to open, which adds a second resource cost on top of the key itself.
- As a reward from a side objective that requires you to manually activate a sequence of three consoles along the dam’s exterior catwalk. The consoles are spread far enough apart that the activity is a clear time investment.
- Rarely, as floor loot in the lower turbine hall, where it competes with other mid-tier consumables and is easy to miss in a fast sweep.
If you are hunting the key on a specific run, the consoles are the most reliable path because the consoles convert time, not luck, into progress. The console sequence is also the path that gives your squad a defensible reason to be on the exterior catwalk, which is useful context for the route section below.
How to reach the locked control room
The locked control room sits above the main turbine hall, on the maintenance level that overlooks the generators. Reaching it cleanly is the harder part of the objective, because the approaches funnel players through the same chokepoints that squads use for the primary extraction. The route below is written for a two or three-player squad running a moderate tempo.
- Drop into the lower dam access road on the west side of the map. This entry point keeps you out of the central turbine hall for the first sixty to ninety seconds of the run.
- Cut through the spillway service tunnel. The tunnel is narrow, lit by emergency strips, and contains one or two ARC patrols. Move in single file, with the player carrying the dam surveillance key in the middle of the order.
- Take the first interior staircase up to the maintenance level. Do not take the second staircase, which leads to the main control deck and a heavy concentration of patrols.
- At the top of the first staircase, turn left along the catwalk. The control room door is the third door on the right-hand side, marked with a faded red sign in current builds.
- Use the dam surveillance key on the door’s lock panel. The interaction takes a few seconds and cannot be canceled without losing the key.
- Clear the room, then post one player on the catwalk entrance as a lookout while the rest of the squad loots.
Solo players can run the same route, but the lookout step collapses. Expect to spend a shorter time inside the room and accept a higher risk of being pushed while your hands are full of containers.
What you actually find inside the room
Players open the door expecting a jackpot and, in most cases, walk out with a more modest return. The room contains three containers, a small data terminal, and a wall locker. The contents vary with the broader loot state of the map, but the role of the room inside the economy is consistent: it is a mid-tier cache that reliably produces crafting materials and occasionally produces one piece of equipment at the blue tier or above.
| Container | Typical contents | Notes |
|---|---|---|
| Floor locker, near the door | Crafting components, common ammo, a single consumable | Always present, low individual value, useful for kit upkeep |
| Wall-mounted cabinet | One mod or attachment, occasionally a weapon | Quality scales with the overall loot state of the map |
| Desk drawer set | Small stack of currency, a chance at a key or schematic | The schematic drop is rare but reported in community logs |
| Data terminal | No physical loot; produces a brief in-game event | Activation completes a tracking objective for some quests |
The data terminal is the part of the room that is most often misunderstood. Activating it does not drop loot and does not grant a buff. It advances a quest tracker, and in some cases it triggers a map-wide ping that other squads can see. Treat it as a soft signal that you are in the room, not as a free reward.
Why the surveillance equipment around the room matters
The “surveillance” part of the dam surveillance key is not a flavor name. The maintenance level contains an interconnected sensor network that the game uses to track movement in adjacent corridors. Players who interact with the sensor console on the catwalk can briefly reveal the position of any hostile players who cross the sensor’s field of view. The reveal is short and directional, so it is a tool for confirming intent, not for sustained tracking.
| Sensor interaction | Effect | Limitation |
|---|---|---|
| Passive | Highlights moving players in two nearby corridors | Only active while a player remains at the console |
| Active ping | Single directional sweep, brief outline of targets | Consumes a separate charge, not the dam surveillance key |
| Linked to data terminal | Activation triggers a map-wide pulse | Other squads can use the same pulse to locate you |
The sensor is the reason the dam surveillance key is worth more to a coordinated squad than to a solo player. A solo player can open the room and loot it, but cannot reasonably hold the sensor console at the same time. A two-player squad can split the workload: one player loots, one player watches the sensor and the catwalk. That division of labor is the most common pattern in successful attempts.
When to spend the dam surveillance key on a run
Spending the key is a timing decision as much as a route decision. Open the room too early, and you turn the rest of your run into a fight over the loot. Open it too late, and the extraction timer leaves you no time to clear the room and extract with what you find. Three windows cover most realistic cases.
- Early window: open the room in the first quarter of the run, then move on. This window is best for solo players who want to keep moving, and for squads who plan to use the room as a stepping stone toward a separate objective.
- Mid window: open the room in the second quarter of the run, immediately after the console sequence on the exterior catwalk. This is the default window for coordinated squads, because the catwalk activity naturally puts you on the maintenance level with the sensor console already in hand.
- Late window: open the room only if you have spare time before extraction and you have not yet seen another squad. This window is conservative, and it is the one to use if the run has already produced most of what you needed.
If your squad is down a member, or if you are carrying a high-value item from a previous objective, the late window is the safer choice regardless of timing. The room does not become more valuable as the run progresses, but the cost of being caught inside it does.
Common failure modes around the dam surveillance key
Most failed attempts at the control room share a small set of causes. None of them are hidden, and most are visible in the moment if the squad is paying attention.
- Opening the door while a second squad is on the same maintenance level. The room is small, the chokepoints are obvious, and a second squad will reach you before you finish looting.
- Triggering the data terminal without expecting the map-wide pulse. The pulse is visible to other players and turns a quiet room into a marked location.
- Carrying the dam surveillance key on the same player who is doing the heavy fighting. If that player is downed before reaching the room, the key is recoverable but the tempo of the run is broken.
- Splitting the squad between the sensor console and the room with no overlap. A single flanking player can collapse both positions at once if no one is watching the connecting corridor.
- Using the key on the wrong door. The maintenance level contains more than one locked door, and a small number of them accept similar key types. Reading the door’s lock panel before spending the key avoids that waste.
The first three items on this list are by far the most common. They are not the result of bad luck. They are the result of a squad treating the key as the goal rather than as a waypoint.
Solo play versus squad play around the key
The dam surveillance key behaves the same in solo and squad play, but the cost-benefit ratio does not. A solo player spends the key, clears the room in under a minute, and leaves with a small but consistent return. The risk profile is higher because there is no one to watch the catwalk, and the sensor console is functionally useless because interacting with it is itself a stationary action.
A squad spends the same key on the same room, but the same room produces a higher effective return per player because the squad can hold the sensor console, watch both chokepoints, and split the loot in a way that keeps each member combat-ready. The squad’s risk profile is lower for the room itself, but higher for the route in and out, because a larger group is easier to spot on the way up.
| Factor | Solo | Squad of two or three |
|---|---|---|
| Time inside the room | About 45 to 60 seconds | About 90 to 120 seconds, including sensor use |
| Sensor console value | Low, because the operator cannot loot | High, because looting and watching can run in parallel |
| Contest risk | High, because the room is unguarded while you loot | Lower, because one player stays on the catwalk |
| Loot per player | Modest, similar to other mid-tier caches | Slightly higher, because the room is held longer |
| Best window | Early, to keep the run moving | Mid, after the catwalk consoles |
If you are playing solo, treat the dam surveillance key as a small bonus, not as a centerpiece. If you are playing in a squad, treat it as a waypoint that justifies a specific route and a specific split of attention.
How the dam surveillance key fits into a longer run
The Dam map is built around a primary extraction arc that funnels most squads through the turbine hall and out the spillway. The dam surveillance key sits next to that arc, not on it, which is why the key rewards players who are willing to spend time on the side objectives. A run that ignores the key is a normal extraction. A run that uses the key is a longer extraction with a small but reliable upside.
The run that uses the key efficiently has a recognizable shape. It opens with a deliberate drop on the west access road, moves through the spillway tunnel, and commits to the catwalk consoles in the first half of the run. It then pushes the maintenance level, opens the control room, clears the sensors, and rotates back toward the turbine hall in time for extraction. The shape is not rigid, but the order of the steps is. Trying to extract first and come back for the room almost never works, because the extraction timer does not pause for side objectives.
Build and loadout considerations for a key-focused run
Players who plan around the dam surveillance key usually shift their loadout in three directions. None of the changes are mandatory, and all of them are trade-offs.
- Lighter weapons and more utility tools, because the route in and out of the maintenance level favors mobility over raw damage output.
- One consumable that improves quiet movement, used for the spillway tunnel and the catwalk approach.
- A single healing item held in reserve for the late window, on the assumption that the room itself is the most likely place to take damage.
These shifts cost firepower. They pay off in the form of faster access to the room and a shorter time inside it. The trade is reasonable when the squad is coordinated and unreasonable when the squad is still learning the route.
How the room interacts with broader quest lines
The data terminal in the control room feeds a small number of quest trackers that are part of the broader progression path through ARC Raiders. The exact quest names change with patches, but the role of the terminal is consistent. It marks the room as part of a larger chain, which means the room is a useful waypoint for players who are working through that chain and a useful piece of context for players who are not.
For players who are not on the relevant quest, the terminal still has a soft value. Activating it produces a brief in-game event and a small amount of reputation with the faction that owns the dam, which is enough to nudge progress without becoming a grind. Players who are on the relevant quest should activate the terminal as part of their standard route, and should not skip it for time, because the quest will route them back to the room later if they do.
Working with other squads around the key
On most servers, the Dam map hosts two or three squads at peak times. The dam surveillance key is one of the few objects on the map that produces a clear audio cue when used, which means other squads will often know the moment a key is spent. The right response depends on whether you opened the room or heard it open.
- If you opened the room, accept that you have a short window before another squad investigates. Use the sensor console to confirm traffic, finish the room in under two minutes, and rotate out before the second squad arrives.
- If you heard a key open, decide whether the room is worth contesting. The room is rarely worth a full fight unless the rest of your run has gone poorly. In most cases, the better play is to reposition toward extraction and let the first squad finish.
- If you are running solo, assume that any loud interaction on the maintenance level has been heard and is being investigated. Solo players who hear a key open should treat the room as a hostile location and route around it.
These defaults are not rules. They are a starting point that can be overridden by specific knowledge of the lobby, the build, and the rest of your run. The point is that the key is a signal, and the signal has value beyond the room it opens.
Common misconceptions about the dam surveillance key
Community discussion around the key has produced a small set of claims that are widely repeated and not all accurate. Clearing those claims up is useful before you commit a run to the room.
- The key is not account-bound. It is map-bound, which means it does not persist between Dam runs but does not bind to a single character or loadout.
- The room is not a guaranteed high-tier drop. It is a mid-tier cache, and treating it as a vault is the most common reason players are disappointed by the loot.
- The sensor console is not a separate key. It is a free interaction, and the only cost is the time spent standing next to it.
- The data terminal is not optional for the room. It is optional for the run, and skipping it is a reasonable choice when the run is short on time.
- The key is not unique to the Dam. Other maps in the same family of locations use similar map-bound keys for similar control rooms, and the lessons learned here apply to those rooms as well.
These are the points most likely to shape a player’s expectations, and most likely to produce a bad run if the player goes in with the wrong mental model.
How patch cycles affect the key
ARC Raiders, like most live-service extraction shooters, rotates loot, drop tables, and quest gating on a regular cadence. The dam surveillance key has been a stable element across recent builds, but the specifics of drop rates, console sequences, and room contents have shifted between patches. The route described earlier is the route that has been consistent in recent community observations, but the room’s exact contents and the console sequence’s exact timing should be rechecked after each major update.
Players who want a stable plan should treat the key as a known constant and the route as a known suggestion, then validate both against the current build before committing a run. That habit is more useful than any specific step in this article, because it scales to every other map-bound item in the game.
Putting it together: a checklist for a key-focused Dam run
The list below is a compact version of the route, decisions, and trade-offs described above. Use it as a quick reference before you drop into the map, and as a recovery checklist if the run goes sideways.
- Decide the window: early, mid, or late. Default is mid, after the catwalk consoles.
- Assign the key carrier: the player who is least likely to take the first fight.
- Assign the sensor operator: the player who is best at holding a position quietly.
- Drop on the west access road, move through the spillway tunnel, take the first staircase up.
- Run the catwalk consoles, then rotate to the control room door.
- Open the room with the dam surveillance key, clear the three containers, activate the data terminal only if the quest requires it.
- Hold the sensor console until the room is empty, then rotate back toward the turbine hall and the extraction point.
- If a second squad is on the maintenance level, skip the room and extract. The key is replaceable, the run is not.
The list is a starting point. The article above explains the reasoning behind each step, so the list can be adapted when a patch changes the room, the route, or the loot.
Where the dam surveillance key sits in the broader game
ARC Raiders builds its identity around a tension between risk and reward that is decided on a per-run basis, and the dam surveillance key is a clean example of that design. The item is small, the room it opens is small, and the time it costs is real. The reward is also small in absolute terms. The value of the key is not in any single drop, but in the way it forces a structured decision: spend it now or save it for later, take the room quickly or hold the position, fight over the loot or extract without it.
That decision structure is what makes the key interesting across many runs, not just the first one. Players who learn the route, the timing, and the contest risk get a small but consistent edge. Players who learn only the route end up over-investing in a room that is not worth a full fight. The skill is in matching the key to the run, and that is the part of the objective that does not change with patches.
Internal resources for further reading
Frequently asked questions
Does the dam surveillance key persist between runs?
No. The dam surveillance key is a map-bound consumable in ARC Raiders. The copy you pick up on one Dam run is consumed when you open the control room, and a new copy must be found on a future Dam run. It does not move with your account or your loadout, and it does not stack across runs.
Can the dam surveillance key be used on any other door on the Dam map?
No. The key is designed for one specific lock panel on the maintenance level. Using it on the wrong door consumes the key without opening anything. Reading the lock panel’s on-screen prompt before interacting is the only way to confirm that you are at the correct door in current builds.
What is the most reliable way to obtain the dam surveillance key on a run?
The console sequence on the exterior catwalk is the most consistent source because it converts time into a guaranteed key, rather than relying on a random drop from an ARC kill or a locked supply crate. The sequence takes several minutes to complete and is the main reason a key-focused run commits to the catwalk before pushing the maintenance level.
Is the dam surveillance key worth using as a solo player?
It can be, but the upside is modest. The room is a mid-tier cache, and a solo player cannot hold the sensor console and loot at the same time. Solo players who want to use the key efficiently should treat the room as a quick stop in the early window of the run, and should not expect a vault-tier return.
Does the data terminal in the control room drop loot?
No. The data terminal does not produce physical loot. Activating it completes a step in a small number of quest trackers, and it triggers a brief in-game event that other players can detect. It is worth using only when a quest requires it or when the run has time to spare.
What happens if another squad hears the key being used?
The key produces a clear audio cue at the door, which other squads on the maintenance level can hear. The opening squad should assume that the room is now a contested location, finish clearing the containers quickly, and rotate out before the second squad arrives. Squads that hear the key in use should generally treat the room as hostile and route around it unless they are willing to commit to a fight.
Is the dam surveillance key affected by recent patches?
The key itself has been a stable element across recent builds, but drop rates, console sequence timing, and room contents have shifted between patches. The route and the room described in this article reflect community observations as of the date of publication, and the exact numbers should be rechecked after each major update.
Does the dam surveillance key interact with any faction reputation system?
Activating the data terminal in the control room produces a small amount of reputation with the faction that controls the dam. The effect is minor and is not the main reason to use the key, but it is a useful side benefit for players who are working through that faction’s progression path.
Can the dam surveillance key be traded to other players?
No. The key is a personal, map-bound item and cannot be transferred between players in the same squad or across squads. If a player carrying the key is downed, the key is recoverable from the location where they fell, but only by members of the same squad and only during the same run.
How does the dam surveillance key compare with other map-bound keys in ARC Raiders?
The key follows the same design pattern as the other map-bound keys in ARC Raiders. Each one opens a specific locked room on a specific map, each one is consumed on use, and each one rewards a coordinated approach more than a solo approach. The lessons learned with the dam surveillance key, including the timing window, the sensor console, and the contest risk, apply in the same shape to the other keys in the game.
Leave a Reply