
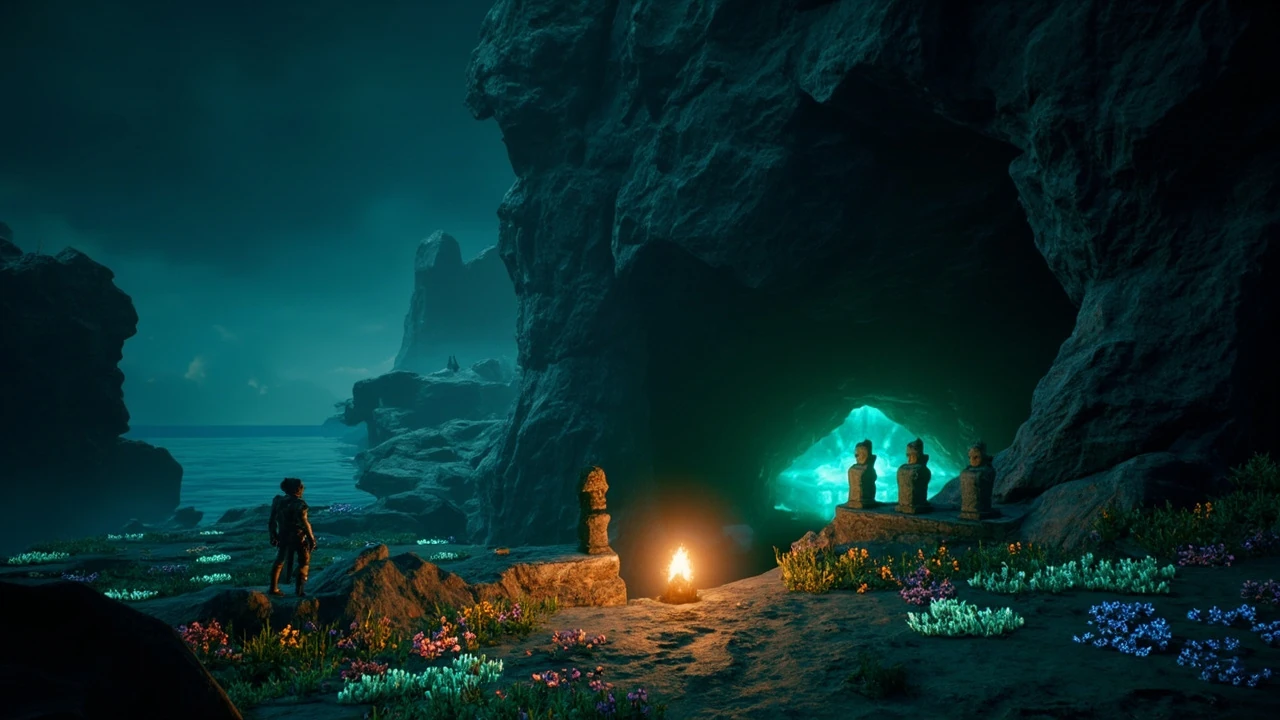
Mystical cave Dreamlight Valley: what the location is and why players return to it
The Mystical Cave is one of the first real side dungeons a player enters in Disney Dreamlight Valley, and it sits at the heart of the Merlin quest line known as With Great Power. Unlike a typical gathering node, the cave is structured as a multi-floor puzzle space with locked doors, three colored statues, a planting riddle, and a final chamber that ties into the larger Orb of Power story arc. Players who only see the entrance usually think it is a one-room event, then return to discover that the cave is a small, hand-designed tutorial dungeon that tests inventory, exploration, and quest sequencing rather than combat skill.
This guide treats the Mystical Cave as a designed game environment and walks through the full quest that unlocks and resolves it. Instead of treating it as a list of button presses, the sections below explain what each room is testing, why the developer placed the puzzle steps in a specific order, and how the cave fits into the broader progression systems of the game. The result is a walkthrough that a returning player can scan quickly and a new player can use to plan their first trip without backtracking through the entire valley.
Quest prerequisites before entering the Mystical Cave
Before the cave becomes accessible, three things need to be true. The player must have unlocked the Dazzle Beach biome, progressed the Merlin friendship line far enough to receive the With Great Power quest, and cleared the path from Peaceful Meadow down to the coastline. Skipping any of these leaves the player standing outside a black entrance with no prompt, which is the most common reason a player believes the cave is bugged when the real cause is progression gating.
Inventory also matters. The cave itself does not require weapons or consumables, but the puzzles downstream require three specific gems and three specific seed types. If the player enters without reading the in-game riddle tablets first, they will be forced to leave the cave, gather items, and return, which extends the quest by several real-time minutes. Planning the inventory before entering saves that round trip and keeps the experience linear.
Time of day does not change the quest, but the lighting inside the cave is always darker than the surrounding biome. Players who prefer reading riddle tablets clearly should consider the optional in-game lamp accessory or simply carry a torch-style tool, because the tablet text becomes harder to read in the lower two floors when no light source is active.
Biome and quest gates
- Unlock Dazzle Beach by spending Dreamlight to clear the corruption blocking the biome entrance from Peaceful Meadow.
- Raise Merlin’s friendship level until he offers the With Great Power quest, which is the only entry point to the Mystical Cave storyline.
- Speak with Merlin at his stall near the meadow slope so the cave marker appears on the map, then follow the water line to the shrouded entrance.
- Confirm that the player has at least one free inventory slot before entering, since the Crystal Key is added directly to the quest slot during the first dialogue.
Recommended inventory before entry
- At least one pickaxe for clearing stone debris near the lower floor and for mining leftover gem nodes after the quest completes.
- An axe if the player wants to remove the optional vines for faster traversal between floors.
- A watering can for the planting floor, because the cave does not auto-irrigate the beds after seeds are placed.
- An empty inventory slot block reserved for the Crystal Key, which the quest gives during the first conversation inside the cave.
Locating the Mystical Cave entrance
The cave sits on the western edge of Dazzle Beach, hidden by a dark fog effect that lifts only after the quest activates. The fastest route is to drop down the left-most slope of Peaceful Meadow, follow the water’s edge around to the left, and keep the shoreline on the player’s right. A small dark arch becomes visible against the cliff face, and the quest marker snaps to it as soon as the player is within a few in-game meters.
Players who wander inland often miss the entrance because the lighting effect blends the cave mouth with the surrounding rock. The visual design choice is intentional. The Dazzle Beach biome is bright and saturated, and the cave is the only major shadowed area on the coastline during the early game, which makes it a useful navigation anchor once a player knows what to look for.
Returning players sometimes report that the entrance feels harder to find after a major update, especially if a new biome has been added to the western coastline. The position of the cave does not change, but the surrounding landmarks can be moved or reskinned, so a player who last visited several updates ago should rely on the shoreline path rather than memory of nearby rocks or trees.
Floor one: meeting Ursula and the Crystal Key
The first room of the Mystical Cave is a single curved chamber with Ursula waiting near the back wall. She explains that she became trapped while searching for the Crystal Key needed to open a deeper door that leads to the Orb of Power. After the dialogue, the Crystal Key is added to the player’s quest inventory and the quest log updates to direct them back outside.
This room is the narrative anchor of the quest. It establishes Ursula’s motivation, sets up the dual-objective structure of the dungeon (collect items, then return), and signals to the player that the Mystical Cave is part of a longer story rather than a self-contained puzzle. Designers often use this kind of opening chamber to teach a quest pattern, and the rest of the cave repeats the same loop: solve a riddle, gather something specific, return, and progress one floor deeper.
Players sometimes try to push past Ursula into the back wall of the entrance chamber, expecting a second door. There is none. The path forward is the stone structure outside, which is a deliberate redirection designed to break the assumption that a single entrance always contains the rest of the dungeon.
Floor one exit: the hidden stone structure
Once Ursula hands over the Crystal Key, the player exits the cave and turns back toward Peaceful Meadow. Just to the left of the slope that returns to the upper grass area, a stone structure is partially buried in the cliff wall. A small column to the right of the main door accepts the Crystal Key, and the larger door opens once the key is inserted. This second entrance is the real front door of the dungeon, and many first-time players walk past it because it is blended into the rock face.
The column mechanic teaches the player how key items interact with the world. The quest is not asking the player to use the key on a treasure chest or a generic interactable. It is a dedicated scripted object that the developer placed specifically for this quest, which keeps the rest of the environment free of clutter. Recognizing that pattern makes subsequent quest dungeons easier to read, because similar key-on-column prompts appear throughout the game.
Once the door opens, it stays open for the rest of the session. A player who leaves the cave and returns later will find the door already accessible, which removes the temptation to search for a second Crystal Key that does not exist.
Floor two: the three statues and the gemstone riddle
Beyond the stone door, the cave descends one floor into a larger chamber with three statues, each wearing a necklace in a different color. A tablet on the wall presents a short riddle: match each necklace color to a specific gemstone. The correct trio is peridot, garnet, and aquamarine. Players who read the riddle carefully only need to gather one of each gem, return to the cave, and insert each stone into the matching statue’s base slot.
The puzzle is less about difficulty and more about teaching the player to read in-game text as a system. The riddle tablet is the only hint the game gives, and there is no on-screen map of which gems go where. Each correct insertion removes a barrier in front of the next stairwell, so the player can see the progress state change after every action. That visual feedback loop is the reason the puzzle feels satisfying even though the answer is fixed.
The statue floor also introduces a small camera trick. After the third gem is inserted, the camera pans briefly to the now-open stairwell, which is the game’s way of telling the player where to go next without adding an extra quest marker. Players who miss that cinematic moment often think the quest has stalled, when in fact the path forward is already visible.
Where to find each gemstone quickly
- Peridot: mined from green-tinted rock nodes, most reliable along the cliffs of Sunlit Plateau after it unlocks, with a smaller spawn pool in Peaceful Meadow.
- Garnet: mined from red-tinted rock nodes, common in the Forgotten Lands biome once it is cleared, with sporadic spawns in the Glade of Trust.
- Aquamarine: mined from blue-tinted rock nodes, found consistently along the Dazzle Beach shoreline and the waterline paths of the Frosted Heights.
- Bonus tip: any pickaxe level that can break the colored rock node will work; there is no elite node requirement for any of the three gems.
Common mistakes at the statue floor
- Equipping the wrong colored gem from the inventory because the icons look similar in dim lighting.
- Trying to insert a gem before the previous barrier has visually dropped, which blocks the interaction prompt.
- Walking past the stone structure entrance a second time after leaving the cave, then wondering why the lower floor is locked.
- Selling the gems to Goofy before returning to the cave, which forces a re-gathering trip and a respawn timer.
Floor three: the planting riddle and crop requirements
Below the statue floor, the cave opens into a chamber with three small planting beds and a second riddle tablet. This time the answer is a list of three crops: carrot, wheat, and tomato. Each bed must be planted with one of the seeds, grown, and harvested inside the cave’s growth window, or the player has to re-seed and wait through another timer.
From a design perspective, this floor is the developer testing whether the player has internalized the game’s farming loop and is willing to use it inside a dungeon space. Most of the valley teaches farming in open biomes with full sunlight. Here the same mechanics run in an enclosed cave, which reinforces that the farming system is universal and not restricted to the valley surface. It also makes the cave a low-stakes training ground before the player commits to large-scale crop layouts later in the game.
The growth timer inside the cave is identical to the outdoor timer for the same crop. There is no cave-specific fertilizer or speed boost, so players who already know their preferred watering schedule can apply it here without changes. Harvesting all three crops in one visit is what triggers the final stairwell to open.
Seed sources for the planting riddle
- Carrot Seeds: purchasable from Goofy’s upgraded stall in Peaceful Meadow, one of the cheapest seed types in the early game.
- Wheat Seeds: available from the same Goofy’s stall in Peaceful Meadow, often stocked in the same rotation as carrots.
- Tomato Seeds: purchasable from Goofy’s upgraded stall on Dazzle Beach, which is the reason the cave quest also gates the player into upgrading the beach vendor.
- Alternative route: a small number of these seeds can occasionally be found in night thorns or gifted by villagers, but Goofy’s stalls remain the most reliable source for all three.
Quest summary table: rooms, riddles, and required items
| Floor | Core action | Required item | Source | Failure symptom |
|---|---|---|---|---|
| Entrance chamber | Talk to Ursula | None | Quest trigger | Quest does not start if Merlin’s line is not advanced |
| Stone structure door | Insert Crystal Key into column | Crystal Key | Given by Ursula | Door stays closed if key is still in another slot |
| Statue floor | Match gems to necklace colors | Peridot, Garnet, Aquamarine | Rock nodes across biomes | Barrier does not drop, blocking stairwell |
| Planting floor | Plant, grow, and harvest the named crops | Carrot, Wheat, Tomato seeds | Goofy’s upgraded stalls | Crops wither if ignored, restarting the timer |
| Final chamber | Reach the Orb of Power site | Completed riddle floors | Quest progression | Door remains sealed if any previous step is incomplete |
What the Mystical Cave teaches about the broader game
Beyond the quest itself, the Mystical Cave is a useful case study in how Disney Dreamlight Valley structures its side content. Each floor isolates a single core system: scripted dialogue, key-item interaction, color-matching logic, and the farming loop. The player is never asked to learn two new systems at once, which keeps the dungeon short but information-dense. When the cave is finished, the player has unconsciously practiced every mechanic the game will reuse in larger quest hubs.
The cave also functions as a soft tutorial for backtracking. The quest design deliberately sends the player out of the dungeon and back in, twice. That pattern is the game’s standard structure for medium-length quests, and recognizing it here makes the larger Merlin arc, the Elsa arc, and the later expansion content easier to read. The Mystical Cave is, in effect, a 20-minute onboarding session for the valley’s overall quest design language.
There is a quiet but real lesson about resource planning as well. The cave’s riddles push the player to maintain a stockpile of low-tier gems and seeds rather than spending every node and seed packet immediately. Players who treat those resources as disposable tend to find the cave frustrating, while players who keep a small buffer clear the puzzles in one pass.
Why the Mystical Cave matters for the Orb of Power storyline
The Orb of Power is a recurring MacGuffin that several dream realm characters reference, and the Mystical Cave is the first dungeon the player clears on the path toward it. Ursula’s imprisonment inside the entrance chamber is the narrative reason the cave is locked at all, and clearing her puzzle path is what reopens the larger story. From a production standpoint, this is also where the game introduces the idea that previous expansions or updates can change the inside of a previously cleared dungeon, which is why returning players sometimes find new objects or NPCs in a space they remember as empty.
For players focused on long-term progression, completing the Mystical Cave quest line is also the trigger for several friendship rewards and one of the first interior decoration items associated with Ursula. It is not the longest quest in the game, but its position near the start of the Merlin arc gives it outsized influence on what unlocks next.
Troubleshooting common Mystical Cave problems
Even with a clean walkthrough, players can get stuck at predictable points. The cave’s design assumes a linear order, and breaking that order usually produces a silent failure state where the quest log still points to the same objective but the world no longer responds to the player’s input. The list below covers the most common situations and how to diagnose them quickly.
Quest marker does not appear at the cave entrance
- Confirm that the Dazzle Beach biome is fully unlocked and that the player has spoken to Merlin at his current location after the biome cleared.
- Reload the most recent save and re-enter the biome. Quest state can fail to sync if the player fast-traveled during the dialogue that triggers the quest.
- Check that no other active quest is locking the marker. The game only displays one primary marker at a time and the cave marker may be hidden behind a more recent quest.
- Walk the entire shoreline once. After major updates, the marker can be assigned to a slightly different path node along the water’s edge.
Crystal Key will not insert into the column
- Make sure the key is in the active quest slot and not the general inventory. If the item is in a storage chest, the interaction prompt will not appear.
- Approach the small column on the right side of the door directly, not the main door itself. The script is bound to the column mesh.
- Leave the immediate area for a few seconds and return, which forces the quest object to reload its interaction state.
- Verify the player’s control scheme; on certain input remaps, the interact button can be mapped to a second action that does not trigger the column.
Statue barrier stays closed after inserting gems
- Verify that the inserted gem color actually matches the necklace on the statue. The interaction accepts any gem, so a wrong color will silently fail.
- Wait for the visual drop animation of the previous barrier to complete before approaching the next statue.
- Use the pickaxe to clear any debris that may be obscuring the insertion slot at the base of a statue.
- Reload the floor from the bottom of the previous stairwell if the state appears desynced after a patch.
Crops will not finish growing inside the cave
- Confirm that the planting bed was actually watered. The cave environment does not auto-irrigate the way open biomes do during certain weather conditions.
- Check the timer in the quest log. The growth cycle inside the cave uses the same real-time clock as outdoor farming.
- Replant if a bed is empty. The quest does not progress until all three named crops are harvested in the same visit.
- Avoid using fertilizers that are flagged for outdoor biomes only; some fertilizer items do not apply to cave planting beds and can pause the timer.
Item and biome reference table for the Mystical Cave quest
| Item | Type | Where to obtain | Cost or effort | Used at |
|---|---|---|---|---|
| Crystal Key | Quest key item | Ursula inside the entrance chamber | Given automatically | Stone structure column |
| Peridot | Gemstone | Sunlit Plateau cliffs, Peaceful Meadow nodes | Node respawn timer | Green necklace statue |
| Garnet | Gemstone | Forgotten Lands, Glade of Trust | Node respawn timer | Red necklace statue |
| Aquamarine | Gemstone | Dazzle Beach, Frosted Heights waterlines | Node respawn timer | Blue necklace statue |
| Carrot Seeds | Crop seed | Goofy’s stall in Peaceful Meadow | Low star coin cost | Planting floor bed one |
| Wheat Seeds | Crop seed | Goofy’s stall in Peaceful Meadow | Low star coin cost | Planting floor bed two |
| Tomato Seeds | Crop seed | Goofy’s stall on Dazzle Beach | Low star coin cost | Planting floor bed three |
| Watering can | Tool | Crafting station or reward chest | One-time craft | All three planting beds |
| Pickaxe | Tool | Crafting station | One-time craft | Optional debris clearing, post-quest mining |
How long the Mystical Cave quest takes in real time
For a player who already knows the path, the Mystical Cave run takes roughly ten to fifteen minutes including travel, the two riddles, and the final dialogue. For a first-time player who has to discover the second entrance, gather gems across multiple biomes, and learn how the in-cave farming works, the quest usually runs between thirty and forty-five minutes. The crop growth timer is the only fixed wait, and it can be skipped or shortened by watering on schedule.
These ranges matter for planning. The Mystical Cave is short enough to clear in a single play session, but it sits between two larger biomes that the player is likely to explore right before and after. Treating the cave as a focused detour rather than a side activity helps keep the surrounding session length reasonable.
Players who play in short bursts should plan the crop planting for the start of a session so that the growth timer can finish during normal play rather than overnight. The cave’s timers are real-time, which means a session pause does not advance growth, and a player who plants at the end of a session will see the beds at the same stage when they return.
Post-quest cleanup and rewards
After the final dialogue, the quest rewards include friendship points with Merlin, a small amount of Dreamlight, and the first interior decoration item from Ursula’s friendship line. The cave itself does not reset or close, so the player can return to it later to mine leftover nodes, revisit the planting beds, or check for any seasonal items the developers add in future updates. Because the cave is part of the larger Orb of Power arc, it can also become a hub for follow-up quests introduced in later patches.
Players who want to use the cave as a farming annex should be aware that the three planting beds are the only permanent agriculture slots inside the dungeon. They are a useful overflow for fast-growing crops but not a replacement for a dedicated outdoor farm plot, because the cave does not have access to the weather bonuses or fertilizer mechanics that open biomes provide.
From a resource management angle, the cave becomes a small daily stop. The gem nodes respawn on the same timer as outdoor nodes, so a short sweep of the statue floor during a normal valley routine can keep a player’s gem stockpile topped up without a dedicated mining run.
Design notes: what the Mystical Cave does well as a quest space
From a level design perspective, the Mystical Cave is a tight example of a quest that uses its environment to teach mechanics. The entrance chamber introduces the key-item pattern, the second entrance teaches backtracking, the statue floor introduces color-coded logic, and the planting floor integrates the farming system into an enclosed space. The dungeon never breaks the fourth wall or pauses to explain what it is doing, which is why experienced players often cite it as one of the more elegant early-game quests in Disney Dreamlight Valley.
The cave also does something that many side dungeons skip: it gives the player a reason to come back. Even after the main quest is complete, the planting beds and the gem-respawning nodes make the cave a small but useful resource location. Designers who want to study quest pacing in a life-sim environment can treat the Mystical Cave as a reference example of how to fold resource nodes into a narrative space without breaking the story logic.
The pacing inside the cave is also worth noting. There are no combat encounters, no timed obstacles, and no random failure states. The only pressure is the crop growth timer on the planting floor, and that timer is set by the player. That design choice keeps the cave accessible to players who prefer low-stress progression, while still rewarding players who plan their route efficiently.
How the Mystical Cave fits into the broader Merlin arc
After the cave is cleared, Merlin’s friendship line opens up to several follow-up conversations that reference Ursula, the Crystal Key, and the Orb of Power. Those conversations are not gated behind additional dungeon content, which means a player who finishes the cave early can advance Merlin’s friendship with simple dialogue choices before tackling any further story content.
The cave’s completion also changes the way Merlin behaves at his stall. He adds new dialogue about the valley’s wider magical threats and occasionally offers small crafting tips that reference the cave’s puzzles. Players who only spoke to Merlin briefly before unlocking the cave often miss this shift, and a quick revisit to his stall after the final dialogue is a good way to confirm that the quest has fully registered.
For completionists, the cave’s clear state is a prerequisite for two later achievements that track how many of the valley’s early dungeons have been completed in a single play session. The cave is one of the smaller dungeons counted toward that metric, but it is usually the first one players add to the tally, and that is why the achievement system lists it by name.
Tips for returning players after a major update
Players who last visited the cave several updates ago should expect minor visual changes. Lighting, ambient particles, and the sound design around the entrance chamber are the most commonly adjusted elements, because those settings tend to be rebalanced when the engine receives a graphical pass. None of those changes affect the quest logic, but they can make a familiar space feel briefly unfamiliar.
It is also worth checking the planting floor for new bed interactions. A handful of updates have added optional side activities to the cave’s lower floors, such as a small foraging node or a decorative object that only appears after a certain friendship level. These additions are optional and never block the original quest, so a returning player can ignore them without losing progress.
Finally, players who have already completed the cave and are returning for a different reason, such as mining or replanting, should treat the entrance chamber as a fast-travel shortcut. The cave is small enough to clear in a few minutes, and because it sits at the edge of Dazzle Beach, it can serve as a quick access point to the shoreline for shell farming and night thorn clearing.
Frequently asked questions
Where is the Mystical Cave in Disney Dreamlight Valley?
The Mystical Cave is on the western edge of Dazzle Beach. From Peaceful Meadow, drop down the left-most slope, follow the water’s edge around to the left with the shoreline on your right, and look for a dark arch set into the cliff face. The quest marker snaps to the entrance once the With Great Power quest is active.
How do you start the Mystical Cave quest?
Speak with Merlin after unlocking Dazzle Beach. Once his friendship line reaches the correct stage, he offers the With Great Power quest, which sends the player to the cave entrance and triggers the storyline with Ursula.
What is the Crystal Key used for in the Mystical Cave?
The Crystal Key is given by Ursula inside the entrance chamber. It is used to open a hidden stone structure just to the left of the slope back to Peaceful Meadow. Insert the key into the small column on the right side of the door, and the larger door will open to reveal the deeper floors of the cave.
Which three gems do you need for the Mystical Cave?
The riddle on the statue floor requires peridot, garnet, and aquamarine, one of each. Match each gem to the statue wearing the matching necklace color, and the barriers blocking the next floor will drop in sequence.
Do the crops inside the Mystical Cave grow faster than normal?
No. The planting floor uses the same growth timers as the outdoor biomes. The only advantage is that the three beds are close together, which makes watering and harvesting faster once the seeds sprout.
Can you enter the Mystical Cave before unlocking Dazzle Beach?
No. The cave is biome-gated, and the entrance is not visible from the overworld until Dazzle Beach is cleared and the quest is active. Trying to reach the cave by swimming around the coastline will not generate a usable entrance.
Does the Mystical Cave reopen after the quest is complete?
Yes. The cave remains accessible for mining, replanting, and any follow-up content the developers add in future updates. Several later quest lines reference the cave as a meeting point, so leaving the area accessible is part of the long-term design.
Are the Mystical Cave statues reusable after the quest?
The statues are scripted for the quest and do not accept additional gems after the barrier sequence is complete. They remain as set dressing and may be referenced in later dialogue, but they no longer serve a mechanical purpose.
What level of pickaxe is recommended for the Mystical Cave?
Any pickaxe that can clear the standard rock nodes in Dazzle Beach and Peaceful Meadow is sufficient. There are no elite nodes inside the cave, so players do not need to upgrade their pickaxe specifically for this quest.
Is the Mystical Cave the only dungeon in the Merlin quest line?
No. The cave is the first major dungeon in the Merlin arc, but the larger Orb of Power storyline includes additional puzzle spaces and follow-up chambers introduced across later updates. Treating the Mystical Cave as the entry point for a longer chain of content is the most accurate way to plan around it.
Leave a Reply